
What is different
The supercharged cars used the same pre-rad, fans, header tank, pump and hoses. The charge is cooled in the supercharger manifold's Laminova cores, not in a separate charge cooler behind the side intake. So the "charge cooler unit" section of the Turbo guide does not apply, and the intake temperature readings in it are from a Turbo. For the supercharger itself, see the NA supercharger fit.
Pre-rad and crash box on NA-based cars
- A 2009 owner of a 2001 car said the Pro Alloy radiator and pre-rad fitted "a treat", with no problems, apart from cutting up some foam lagging to fill gaps where there was no original foam.
- Another 2009 owner said the kit needed two pieces cut off the crash box, and that the radiator housing then sat out of line, which misaligned the clam. That matches the next point, so it was probably an NA-based car.
- Plastic sections on the crash structure: a 2009 owner fitting to an NA-based car found there are two plastic sections bonded to the crash structure that must come off, or the pre-rad cannot go in. These are not fitted to the Turbo. Another owner added that the radiator is carried by those supports, so you then need to support it on hard foam. The surround material is weak, and the standard closed-cell foam can be cut down to fit.
Hoses through the sill
The Turbo guide has the original 2007 owner's method, pulling the hoses past the foam with a piece of conduit. Owners fitting the kit in 2009, mostly to supercharged cars, did it differently, and there was no agreement on the best way:
- Through the front blind grommet. One owner found a blind grommet of about 14 mm at the bottom of the front of the sill. He took it out, pushed the foam aside with a length of dowel, reached down from the rear arch to move the second block, then pushed old tube along from the rear and threaded the hoses through. He called it one of the easier parts of the job.
- Cutting an access hole. Another cut a hole in the sill end to get a straight run, and closed it again afterwards with epoxy. A third cut 51 mm holes in the sill end faces, hidden deep in the wheel arches, and planned to close them with rubber inspection grommets. He cut the foam with a piece of aluminium pipe with nicks cut into the end, twisted by hand, then enlarged the hole with a hacksaw blade taped to a stick.
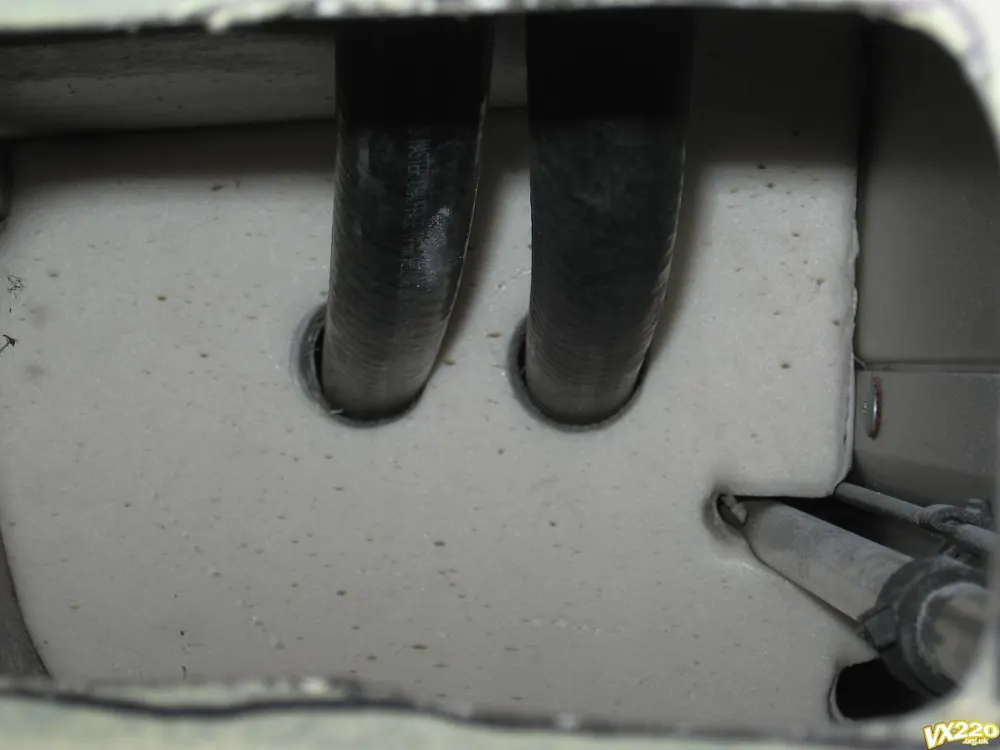
- Melting the foam. One owner didn't want to demolish the foam, which he said is not the strongest part of the car. He heated a thin-walled pipe with a torch and melted round holes through the front block, then did the same with a longer thin tube for the back block. He used that tube to pull the hoses through. Test the temperature on a piece of polystyrene first. The photo below shows the finished holes.
- Taking the sill cover off. This is only needed to pull the hoses up to the two top holes. It is held by two screws and a pull, unless it has been stuck down with sealant. One owner said heating the aluminium behind the joint lets you slice through the glue, lubricating the blade with WD40 or silicone spray, and one owner mentioned paying about £120 for a new sill cover. A side benefit of a bigger access hole: one owner took three stones and a hair clip out of the sill and said the rattles under acceleration and braking stopped.
Pump power
The pump should only run with the engine. The 2007 Turbo method, with a battery feed and a relay switched from the fuelling circuit, is in the Turbo guide. The supercharged car owners did it differently:
- Fuse box and boot relay (2009, supercharged). One owner took the live feed from the battery through a new fuse in the fusebox and the relay slotted into one of the spare relay positions in the boot, and spliced the switched live into the fuel pump feed. He soldered the pump and relay earths into the ground wire before the chassis earth point in front of the pass side rear wheel. He said this looks more factory.
- The fuel pump relay coil wire (2015). A supercharged car owner asked for best practice for a pump that runs whenever the ignition is on. The replies don't say which engines the other owners had, but two said most people use the fuel pump feed, so the pump runs for a few seconds while the fuel system primes and then stops until the engine is started. A third said to use the white/violet wire that feeds the fuel pump relay coil to feed the charge cooler pump relay coil as well. That is a single post from an owner on one car, so check it against the wiring diagrams and with a meter before you cut into anything.
Neither fuse figure for the Turbo kit has been confirmed, so decide the fuse value from your own wiring.
The order the water takes (Laminova cores)
A 2009 owner fitting the kit's pre-rad and pump to a car with a dual-pass Laminova manifold asked what order the water takes. Two owners gave the same answer: header tank, then pump, then pre-rad, then the manifold (or charge cooler), then back to the tank. The reasoning given was that the pump heats the water slightly, so you put the pump first for the coolest water. One thought it made little difference, and the other used the same order for a better hose layout. For the dual-pass cores, water enters through the centre cores and flows out through the outer ones, and two of the Laminova cores need turning round to follow that path, with the small hole as the water inlet and the big slots facing the air gap. See the NA supercharger fit.