
The 2003 thread is the original rear pad guide, written to follow the front pad one. Most of its photos were lost from the forum, but a PDF copy was posted in 2006 with the pictures, so several are back here beside the matching steps. This page relies mainly on the original words, with the many corrections and additions from owners over the next eight years. Owners say the job is easy once you know the tricks, but the two parts people struggle with are winding the piston back and getting the caliper to hinge down. The front pads are a simpler job: see front brake pad replacement. For stripping a caliper completely, see rear brake caliper strip-down. If you are replacing the discs too, see rear brake disc replacement.
Removing the old pads
- Take the top off the brake fluid reservoir (pushing the piston back sends fluid up the reservoir), loosen the wheel nuts, jack up the car and make it safe, and take off the wheel.
- Make sure the handbrake is released throughout.
- Fully undo the 17 mm bolt at the top of the caliper.
- Tap out the retaining pin with a pin punch from the rear, or a nail or similar. Look at how the spring clip is orientated as you remove the pin, and don't lose it. One owner found removing the pin the hardest part of the job, and eventually used the metal end of a voltage detector tool. A long nail also works.
- Gently tap the outer pad down and out.
- Lean the caliper backwards on its mount (it hinges on the lower bolt), and you can then take out the other pad. See below if it won't hinge.
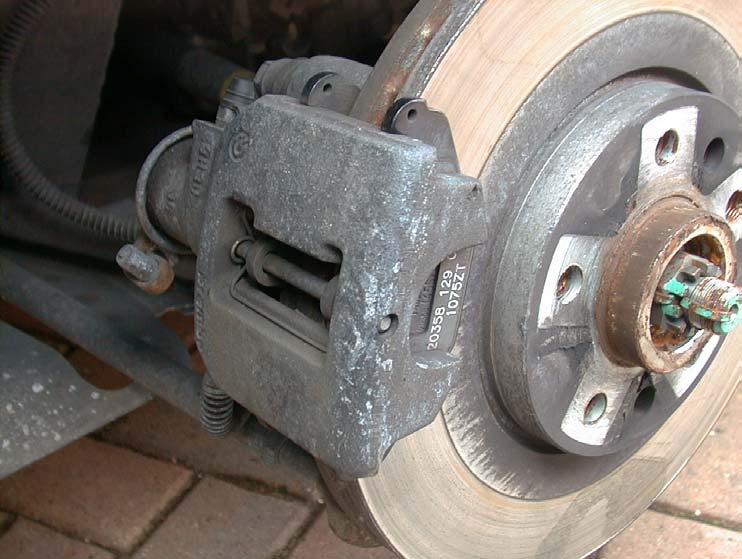
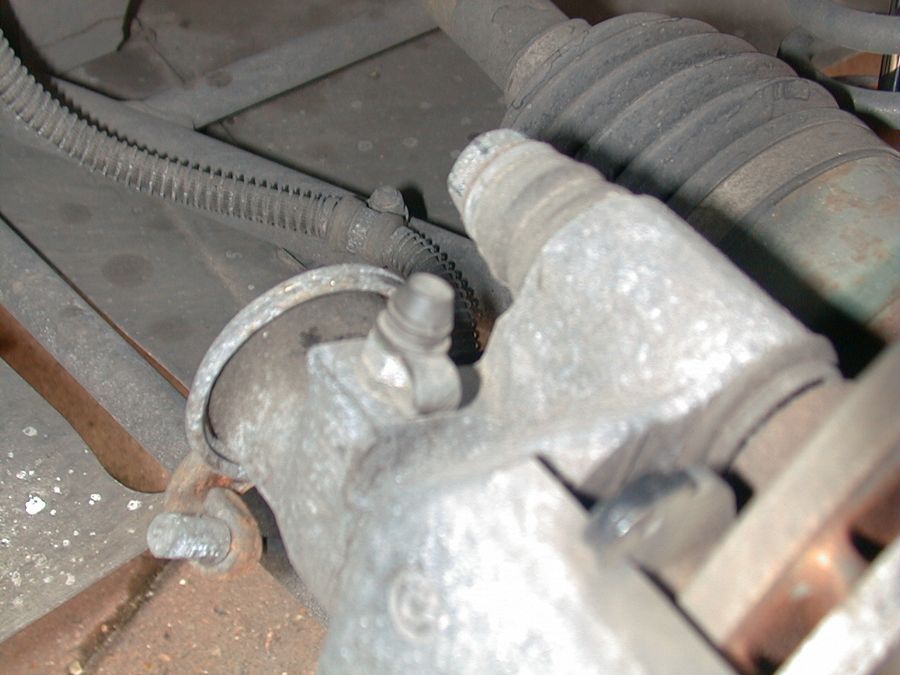
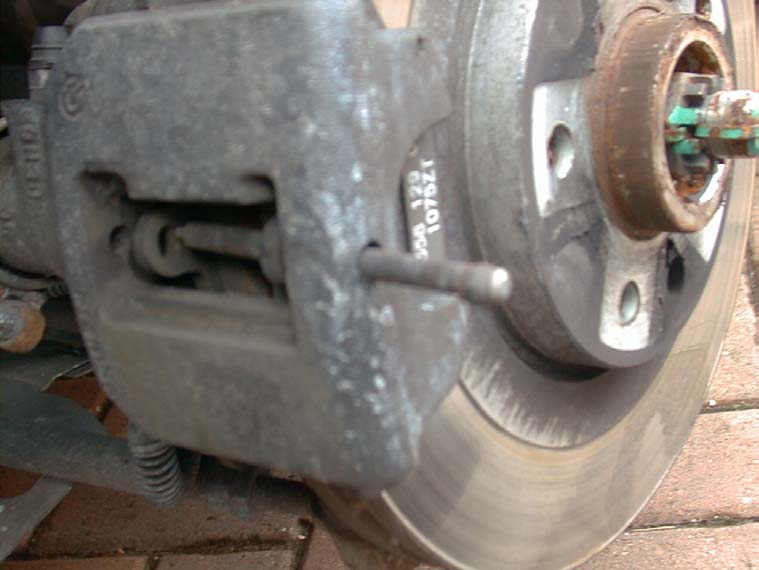
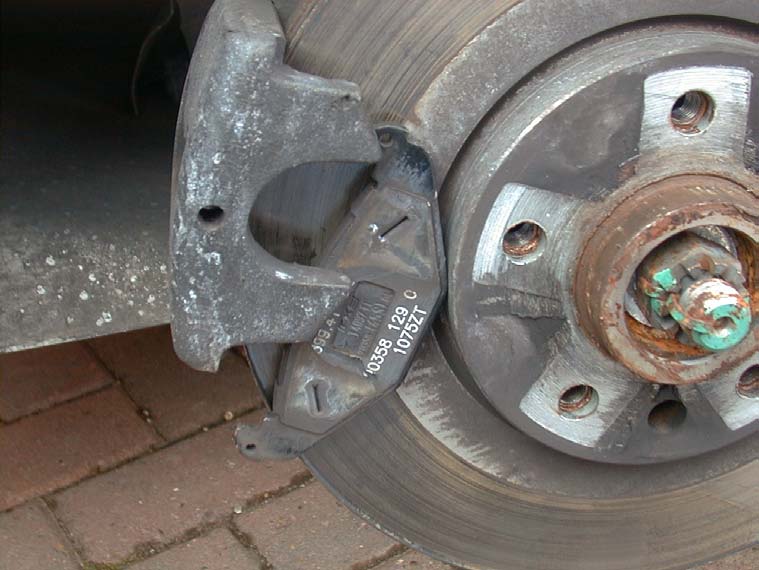
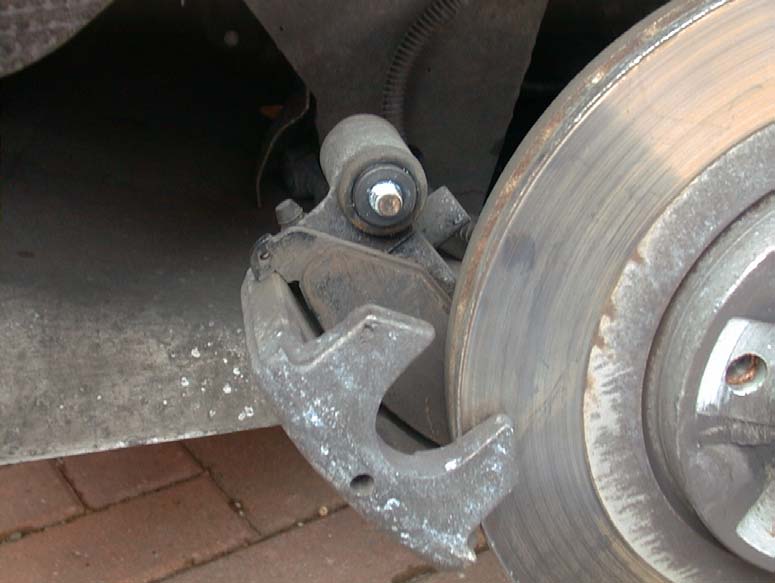
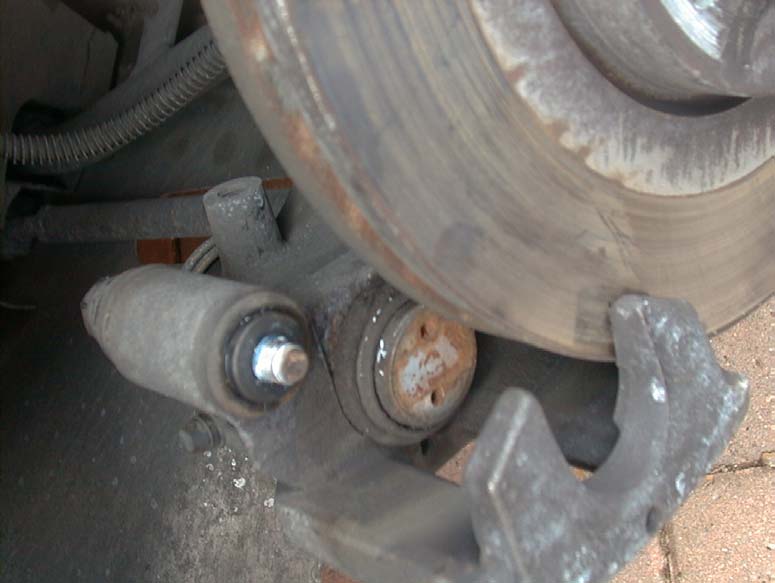
If the caliper won't hinge down
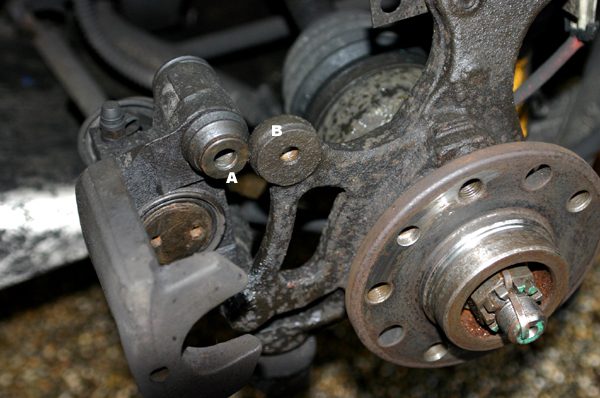
Many people stuck here. You only need to remove the top 17 mm bolt, and the caliper hinges on the lower bolt, so don't undo the bottom Allen bolt first. The reason it doesn't fold down is that the end of the barrel the bolt passes through still sits in a cup in the mounting. In the photo below, the end of the barrel (A) sits in the cup (B). The caliper won't tip back until they are separated.
- Tap it free: tap gently at the opposite end of the barrel with a wooden block, or something that won't slip and split the rubber boot. It doesn't take much force.
- Slide it inwards: the bolt hole locates on a hollow pin about 5 mm long, which is the threaded part of the mounting bracket. Slide the caliper towards the centre of the car to free it, and it should then fold down. It has to be pushed all the way in, towards the body of the car.
- Wriggle it: the steel boss the bolt goes through sits in a chamfered recess in the hub, and can stick. Wriggling it back and forth freed one. On another car, corrosion had seized the lug and caliper together.
- The disc lip: on a worn disc the 1 mm lip at the edge stops the pad and caliper swinging back over it. One owner says this method won't work on a car that really needs its brakes done, because of the lip and rust. Another got round it without removing the lower bolt by twisting the piston right back first.
- Take the disc off instead: two owners remove the disc at the same time. The sequence: remove the caliper pin, knock the outer pad through to the centre and out, remove the disc locating screw, pull the disc off (pulling the caliper for clearance), then remove the inner pad. This means you don't touch the calipers or the handbrake. Refit in reverse, using something to locate the inner pads until the pin is back in. One of them says that next time he will always remove the disc to get at the inner pad.
The handbrake cable: do you need to disconnect it?
Owners differ. One was shown to unbolt the Allen bolt, disconnect the handbrake cable and flip the caliper upwards, while the video shows the big bolt removed and the caliper flipped down. Another has never disconnected the handbrake from either caliper, other than when replacing the gear selector cables, and is pretty sure he flipped it down. The thread leaves it there. The original steps don't mention disconnecting it. One owner also found the lower Allen bolt hard to reach because of the brake cable.
Winding the piston back
With a pair of large long-nosed pliers, push the piston back while rotating it clockwise until it is fully retracted. You need it well back to fit the new pads, because thick new pads need the room.
- Why turn it: it isn't on a thread, and you can turn either way. Turning stops the seal biting and bunching as it goes back into the bore, like a sink plunger. Another owner thought the twisting winds back the handbrake self-adjustment, which was also mentioned for Astra rear calipers. These explanations differ and the thread didn't settle it.
- Direction: one owner thought it might be anticlockwise on one side and clockwise on the other, but wasn't sure and asked for confirmation. Another used clockwise "IIRC" on the car side he was working on. Nobody confirmed a difference between sides.
- Which tool: the holes in the piston face take the tips of long-nosed or circlip pliers (opened so the two prongs go into the holes), and several used ordinary needle nose pliers, but fat ones are better than small ones that bend. One owner used an R clip once, with "a lot of swearing". Eliseparts sold a rear brake adjusting tool (about £11.69 in 2004), but it didn't fit for two owners, one of whom also said there was no space to turn it, and another couldn't find the right size in three shops. A third recommended it, so results varied.
- Keep pressing while turning: one owner found that a G clamp didn't work but twisting and keeping on twisting did, without much pressure.
- Dust seal twisting: the rubber dust seal can twist with the piston. Gently ease a thin screwdriver between the seal and the piston and slide it all round, after which the piston went back easily and the seal stayed in place.
- Lubricant: one owner suggested pre-soaking the piston with WD-40, but another says not to use WD-40 (bad for the seals, and may contaminate the fluid) and to use silicone grease or spray instead.
- Easier with the disc off: those calipers are easy to wind in with the discs off.
- Difficulty varies. One owner found the whole job much more difficult than it looks, and getting the calipers back was a nightmare. Another found winding back very easy, just a few twists.
Fitting the new pads
- Optionally copper-grease the 17 mm bolt and refit the caliper loosely.
- Fit the new pads, replace the pin and spring clip, then tighten the 17 mm bolt fully. Only the spring clip is moved over from the old pads: the Mintex 1144s came with their own rubber shims. One owner adds "loads of copper slip".
- Refit everything else.
- Pump up the brakes before moving the car.
- The original author says it is a good idea to replace the brake fluid and bleed the system as well. See brake and clutch fluid replacement.
Discs and bedding in
- Do the discs at the same time: it costs little and takes little time. One owner also suggests replacing the lower slider bolt if it hasn't been done in two or three years, because the head felt soft.
- Disc screw: owners found it very tight. One used an impact screwdriver, another a wrench handle for leverage. A third had one come out easily and the other needed drilling and persuasion with a club hammer. He drilled it a bit bigger, forced a Torx socket in and unscrewed it, then reused it to keep the wheel aligned. The part number for a new one is 90278945 (countersunk M10). One owner thought the Allen key was 7 mm but wasn't sure, and no one confirmed it. Another thread (the inner CV boot one) quotes a 5 mm locating screw on the disc.
- Clean the new disc thoroughly, as the instructions with the disc said (one owner used cellulose thinners).
- Bed the new pads in. One owner bedded his in and then noticed the 1144s felt and sounded rougher than before. Another had an occasional pad groan at very low speed after fitting 1144s.
- Check pad thickness first: one owner's service said the rear pads were very low, but they actually had a good 3 to 4 mm left on each.
Other things people asked
- Adjusting the handbrake (2006): asked, and no answer in the thread.
- Thread lock on the 17 mm bolt (2004): asked, and no answer. The original only suggests copper grease.
- Wheel nuts: if they are very tight, a 17 mm wheel brace from another car worked. One owner used an axle stand in light contact as a backup, with the car on the jack.
- A 2010 comment notes that the original guide was done on a pristine example with no rust or grime, so expect more difficulty on a real car. There is also a link to a video of the job, in the sources below.