
This was written in 2003, and the rears were done afterwards (see rear brake pad replacement). It is quite an easy job, with no bolts to undo whatsoever. The photos were lost from the forum, but the thread was copied into a PDF in 2006 and posted with the pictures, so they are back here beside the matching steps. Someone later linked a video of the job in the thread. If you are replacing the discs too, see front brake disc replacement.
Taking the old pads out
- Raise the car, support it safely and remove the wheel.
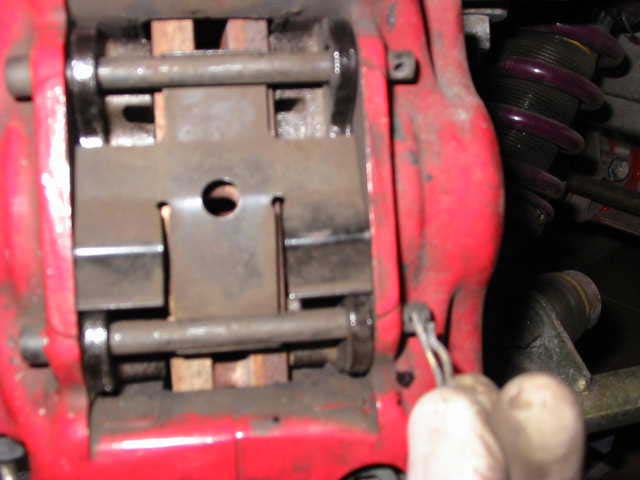
- Remove the clips (the original calls them "pins") and punch out the two rods from behind. Be careful, because the retaining plate will spring out when the rods come out.
- The two pads then slide out easily. At most, prise them out gently.
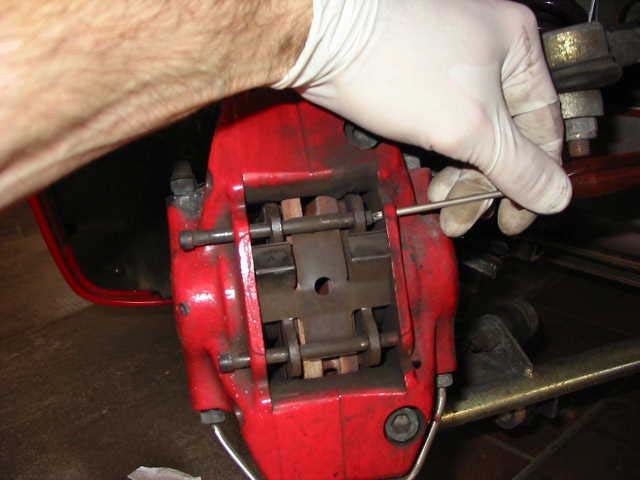
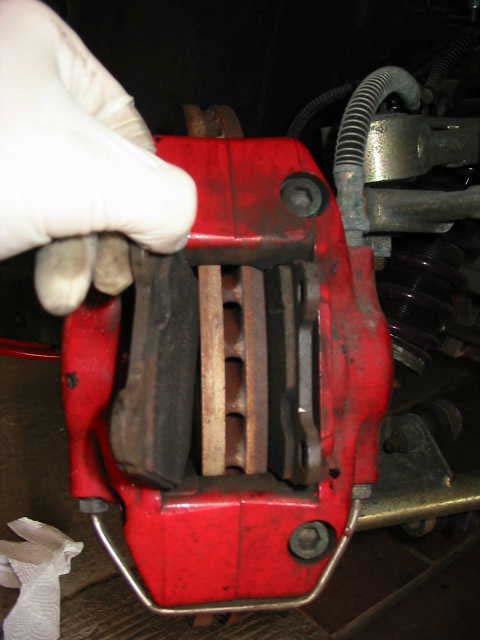
Pushing the pistons back
- Open the cap of the brake fluid reservoir (pushing the pistons back sends fluid up the reservoir), and don't forget to close it afterwards.
- Prise the calipers as wide as they go, using any tool as long as it isn't sharp, because you could cut the rubber sleeve.
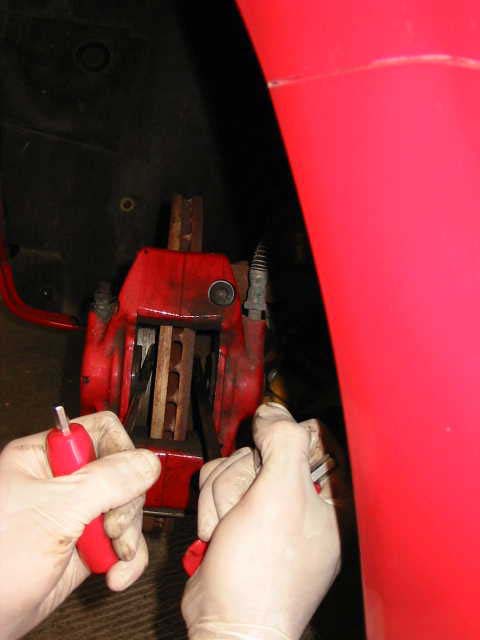
- Use the old pad as a shield (2008): put a thin tool between the old pad and the disc and prise outwards. It is not certain whether this is a good idea, but it pushed evenly on the piston and there was no chance of cutting the piston seal.
- The ridge on the disc: there is a trick from an Elise site for starting to prise the pads apart so that they clear the small ridge at the outside of the disc, using a hammer. It wasn't tried, and its photo is lost, so the thread doesn't show how it is done.
Fitting the new pads
- Slide in the new pads.
- Refit the two rods, keeping the retaining plate underneath them, and don't forget to refit the two clips.
- The retaining plate isn't mandatory. It limits pad rattling, squealing and clicking. Track-day drivers leave it out because it gives better cooling, so it is a personal choice, and track users may want to try without.
- While you are there, you can bleed the system too, but you need a partner to press the brake pedal. See brake and clutch fluid replacement.
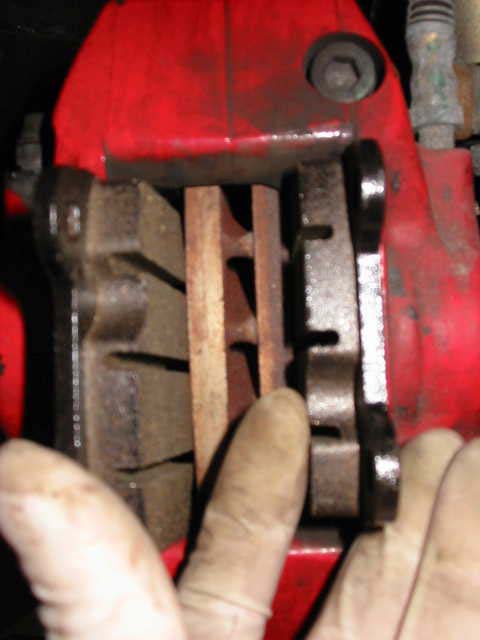
Bedding in
Take it easy for the first few miles while the pads bed in. After a few days, prepare them properly: do four or five medium braking sessions on an empty stretch of road to get the pads up to temperature, and then, without cooling time, three or four emergency stops from 60 to 20 mph. Expect temporary fade, as the brake resins can evaporate in the process, and the discs should look purplish afterwards. That is the original author's own procedure and not a manufacturer's, so check the instructions that came with your pads.
Other notes
- Uneven wear: wear is higher on the inner pad and even more on its bottom half. The pads can be swapped between the inner and outer positions for more even wear, though they have to bed in again after being rotated.
- Time and cost: all of 20 minutes, and very straightforward. Another owner said it was easy and wondered why a garage would charge £400 or more for all four pairs (2003 prices).
- Rear pads: one owner found the rear caliper, outer pad and disc a nightmare to get back in place, which is covered in the rear pad guide.