
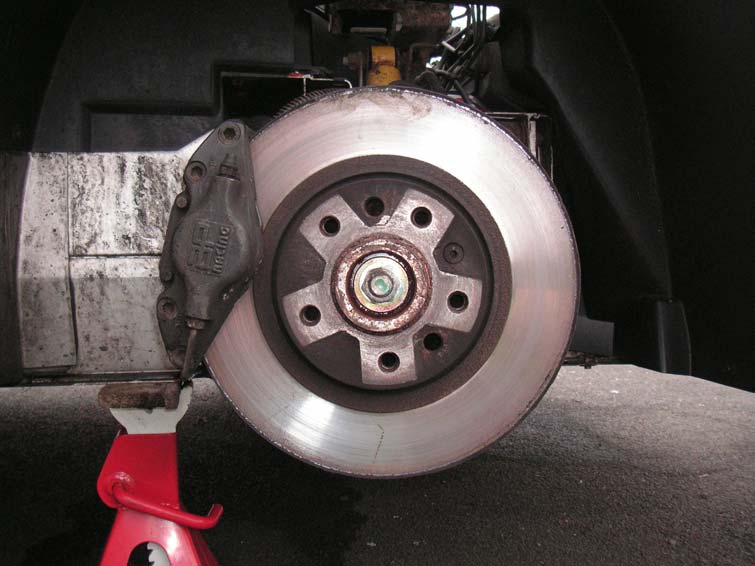
This 2006 text was an addition to the rear pad guide. The author admits he was lazy: the rear disc section is the front disc text copied across, including its photo, on the grounds that the discs are the same. So treat it as a description of the disc job in general, not a record of doing a rear. For the front discs see front brake disc replacement.
Steps
- Take the pads out and wind the piston back, as described in rear brake pad replacement.
- Undo the disc screw in the front of the disc. If you are lucky and the discs haven't been on long, it will come undone with a 5 mm Allen key, but it is best to use an impact driver to start it off. If it is seized, you risk rounding the socket. One had been rounded, and the author had to take it out with a 12 mm drill. The disc is held on by the wheel bolts, so the screw isn't structurally needed. It just holds the disc while you reassemble everything.
- Take the disc off. Use axle stands because, if the discs have been on a while, they will probably have rusted onto the hub. The author's took a good 10 minutes of gentle persuasion with a lump hammer, turning the disc 90° after each hit. Make sure the caliper is secured before you start hammering.
- Fit the new disc. Wipe off the thin oil it came coated in. When you refit the disc screw, don't do it up too tight.
- Fit the new pads as in the pad guide.
Does the caliper have to come off?
The original text doesn't say how the caliper was cleared, only that it must be secured before hammering. Owners disagree:
- No (2014): you don't have to remove the rear calipers. Push the pads to the centre and out, and there is then enough clearance to take the disc off. That means no handbrake cable to disturb, no safety-critical bolts, and no chance of damaging the boots. If it is still tight, pull the caliper away from the car on its slider and wind the piston in, which gives you lots of space.
- Yes: on another owner's car there was no chance of squeezing the pads back that far, because the clearance was too tight, and he found it much easier to remove the caliper.
The pad guide has more on this, including taking the disc off first to get at the inner pad.
What other owners found
- Old discs (2010). One owner's were about 63,000 miles and 8 years old. He, with help, knocked lumps out of them getting them off the hub. He now thinks the pads should be done with the discs next time.
- A rear disc dragging afterwards. After the job, one rear disc dragged as it warmed up, swelling until the wheel was hard to turn by hand, and then ran freely once cool. The handbrake seemed to release fully, but they hadn't adjusted it after doing the brakes. He and a friend suspected a sticky caliper, and asked whether to strip and regrease it or replace it. The thread doesn't say what the fix was. For stripping a caliper, see rear brake caliper strip-down.
- Time. One owner called it a 30-minute job on each side.
The disc screw
The original text says 5 mm, but that came from the front disc. In the rear pad thread, the part is given as an M10 countersunk screw (90278945), and another owner thought the Allen key was 7 mm but wasn't sure. Nobody confirmed the rear size, so check what fits yours before you force it.