
This was written up in 2006 by an owner replacing his discs while doing the tie rod guide. He copied two earlier pad threads into a Word document, added his own notes on taking the discs off, and posted both as PDFs. The disc steps below are his. He says renewing the fronts is a little more difficult than the rears, because you have to undo two bolts. For the rear discs, see rear brake disc replacement.
Steps
- Take the front pads out first, as described in front brake pad replacement.
- Undo the two socket-head bolts that hold the caliper on, with an 8 mm Allen key.
- Move the caliper aside. It can then be rotated and rested with "the steering rack down the centre of the caliper". The thread doesn't explain that any further. Our own suggestion, not from the thread, is to support the caliper rather than let it hang from its brake hose.
- Undo the disc screw in the front of the disc. If you are lucky and the discs haven't been on long, it will come undone with a 5 mm Allen key, but it is best to use an impact driver to start it off. If it is seized, you risk rounding the socket. One of the author's had been rounded at some point, and after trying different methods of extraction he had to take it out with a 12 mm drill. The disc is held on by the wheel bolts, so the screw isn't structurally needed. It just holds the disc while you reassemble everything.
- Take the disc off. Use axle stands because, if the discs have been on a while, they will probably have rusted onto the hub. The author's took a good 10 minutes of gentle persuasion with a lump hammer, turning the disc 90° after each hit. Make sure the caliper is secured before you start hammering. Wear eye protection.
- Fit the new disc. Wipe off the thin oil it came coated in. When you refit the disc screw, don't do it up too tight.
- Refit the caliper, then fit the pads as in the pad guide. For the torque, see below.
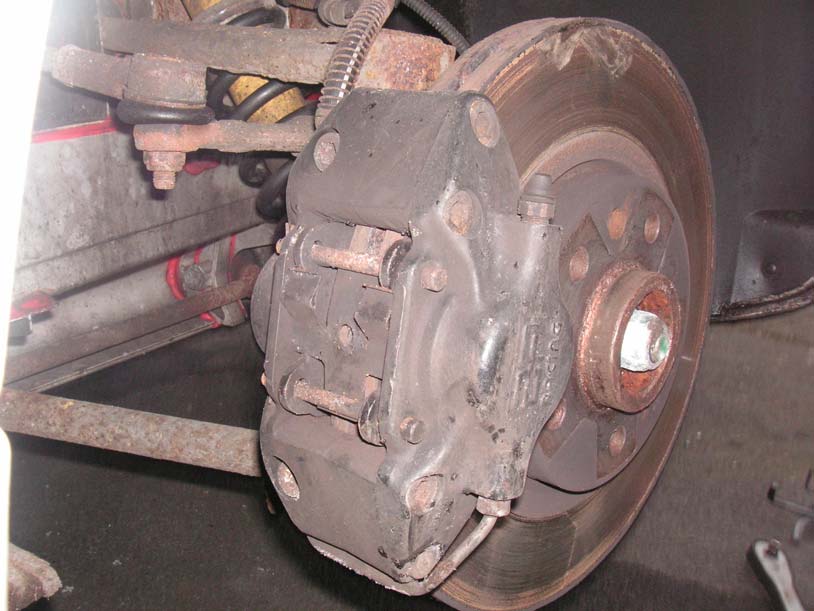
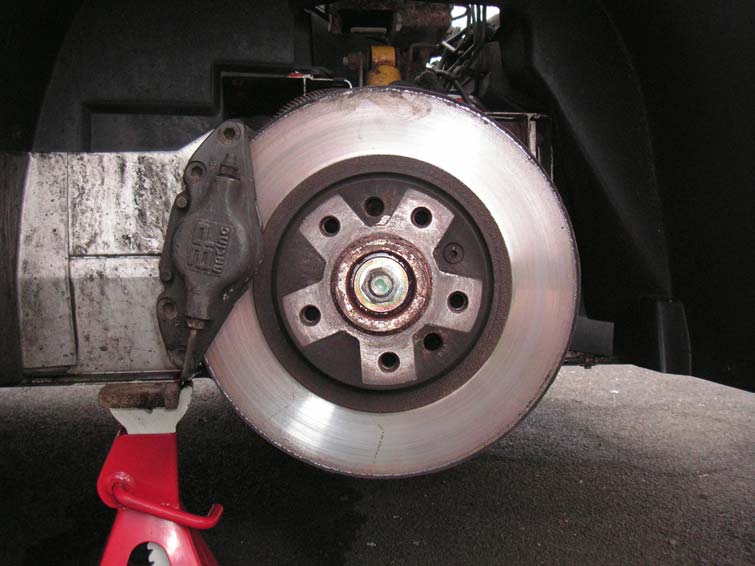
Torque
Someone asked in 2006 whether there were torque settings for refitting. None could be found in the TIS for the caliper (it only gives wheel bolt torque, on both the pad page and the caliper removal page), and the author did his caliper bolts up to just over 45 Nm, which felt tight enough. That is his own figure, not a factory one. The torque values list has 45 Nm for the front caliper to hub carrier, but its source isn't known either.
What other owners found
- Old discs can be a fight (2010). One owner's discs looked about 63,000 miles and 8 years old. He, with help, knocked lumps out of them getting them off the hub, in the rain. He now thinks that next time the pads should be done with the discs, because the extra effort and cost is small.
- Impact driver on the disc screw (2013). One owner took the tip and used one on the 5 mm screw. It worked well and didn't round. He didn't refit it, because his aluminium bells don't have the hole.
- Aluminium bells and discs. Two owners used this guide to fit them. One says his aluminium bells and discs weigh 5.3 kg, against 7.1 kg for the original discs.
- Time. A 30-minute job on each side.