
The ticking belt (early Turbos)
In April 2004 it was found that on the VXT the alternator belt can come off the pulley, and the guide pulley then ticks because the belt isn't under enough pressure. Belts started to fray before they were replaced. Several owners had the same, and some had to wait weeks for parts. Here is what the owners reported.
- The noise. A loud, consistent tick that rises and falls with engine revs, from the right-hand side of the engine bay. Others describe a fan-belt type slip or chirp, or more of a flailing noise, like a belt hitting a hard object quickly. One tick was intermittent and didn't rise with revs, so that may have been something else.
- Looking at it. The belt is completely covered by the inner wheel arch, so it is a wheel-off job. The inner arch is quick to remove, with a couple of Allen bolts.
- Other ticks. Minor ticking from the right-hand side is likely the fuel solenoid valve, which is normal, and the belt tick is pretty obvious. Another owner thinks the harmless tick is the fuel pump relay. The thread doesn't settle which. Ticking that goes away when the engine warms up could be a different problem, and one dealer said it could be the timing chain.
- Dealers. Several owners say their dealers blamed the fuel solenoid valve, or didn't recognise it. One dealer lubricated the belt because it looked dry, and the noise then got much worse. Vauxhall were reported to be looking at an uprated part swap, and it was not an official recall. One owner was told there was a recall on the alternator pulley, and the thread doesn't confirm that.
- What happened when it let go. On one car the belt snapped, it wouldn't start, and the head came off and had bent parts. Another had no compression and just whined on the starter, and ended up with a new engine.
Does your car have the revised bracket?
The fix is a revised idler bracket. One owner was told the pulley was 4 mm out of line. Another says the new bracket is 4 mm smaller and the belt only lines up with it, while the 2007 guide says the revised one is slightly larger, so the owners' descriptions don't agree. Cars numbered after about 7200 were sorted at production. The number is called the VIN number in one post, and other owners quoted theirs as build numbers, such as 7344 and 7793. One owner had his checked at the first service and it was the revised one.
- If the belt isn't slipping, leave it as it is.
- One car with a build number after 7200 still had a slipping belt, so the owner ordered the bracket anyway. Another found 10 cm of one of the belt's ribs resting on his inlet manifold (build number 7065).
- One dealer's parts catalogue had no note about a new or revised part, and Vauxhall hadn't known about it until given the number. Some owners say the bracket should be covered under warranty, but that is their opinion, not a statement from Vauxhall.
Belt off and on
Turbo (2007)
- Take the wheel and the wheel arch liner off.
- Release the tension. The cam belt guide turns the central tensioner bolt clockwise to release it. The 2007 method lifts the tensioner with a 15 mm spanner.
- To refit on your own: feed the belt around the idler and the crank pulley, then under the tensioner, and hold the top of the belt ready for the alternator. Lift the tensioner with the spanner in one hand and pop the belt onto the alternator with the other.
- The hardest part is getting the arch liner back in.
NA and other cars
- The TIS makes it look pretty easy, and it doesn't mention taking the clam off or any other steps. Getting the belt off is as easy as the TIS says, and getting it back on is harder.
- Make sure the belt is seated on the crank and alternator pulleys first. Put a 3/8" ratchet into the hole on the tensioner to lift it out of the way, push the belt with your thumb onto the smooth idler on the tensioner, then release the tensioner.
- Clockwise on the bolt in the middle of the tensioner pulley releases the tension (2014).
Check the belt length. On a supercharged car, one owner fought for 5 hours to fit a new belt marked 05PK 0875, when the original was 05PK 0880. 5 mm shorter made a big difference. The old belt went back on in about 3 minutes. Another owner couldn't loop the belt over the pulley edges when fitting an underdrive kit, and instead put the belt over the alternator pulley, located it in the grooves with the crank pulley off, and then fitted the crank pulley over it.
Fitting the revised idler bracket (2007)
It takes about an hour and is simple enough for anyone with basic mechanical knowledge. The photos aren't in the saved thread. The thread gives no torque figures for the bracket bolts.
- Jack up the rear of the car at the designated jacking points and support the wheels on ramps (see Jacking and supporting the car).
- Take off the middle undertray: undo the 5 M5 bolts that connect it to the rear undertray (8 mm socket), the 6 M5 bolts (3 each side) of the middle tray, and the two M8 bolts in the centre (5 mm hex bit).
- The belt assembly is on the driver's side of the engine. The belt loops around four wheels, from the bottom clockwise: the drive wheel (crank), the alternator, the tensioner pulley, and the idler pulley, which sits on the end of the idler bracket (the AC idler).
- The bracket is held to the block by three Torx bolts. With the E12 socket, undo the two bolts closest to the idler wheel first (one is behind the pole attached to the wheel), then the one furthest away. Unthread the belt and take the bracket out. Space is limited, so it can be tricky.
- Fit the new belt, threaded round the wheels the same way as the old one.
- With the bracket out, pop off the black cap on the idler wheel with a small flat screwdriver, and use the E14 Torx socket to unbolt the wheel from the bracket. The old and revised brackets look very similar, but the new one is described as slightly larger. Bolt the wheel onto the new bracket.
- Refitting is the hard part, because the belt is very tight and only stretches a little. Put the E14 socket on a short (about 2 inch) extension on the idler bolt, place the bracket so it touches the bottom of the tensioner wheel, thread on the belt, and push upwards with one hand on the socket and the other holding the bracket. Start the two front E12 bolts by hand, then tighten them evenly with the ratchet, which brings the bracket in line for the far bolt. Fit the last bolt and tighten them all.
- Refit the cap on the idler wheel and the undertray.
Tip: some people may find it easier to refit the wheel to the new bracket before fitting the belt, then put the belt on last. With a socket on the end of the tensioner you can lift it to make enough slack to slip the belt on.
Is it the belt, the tensioner or the idler?
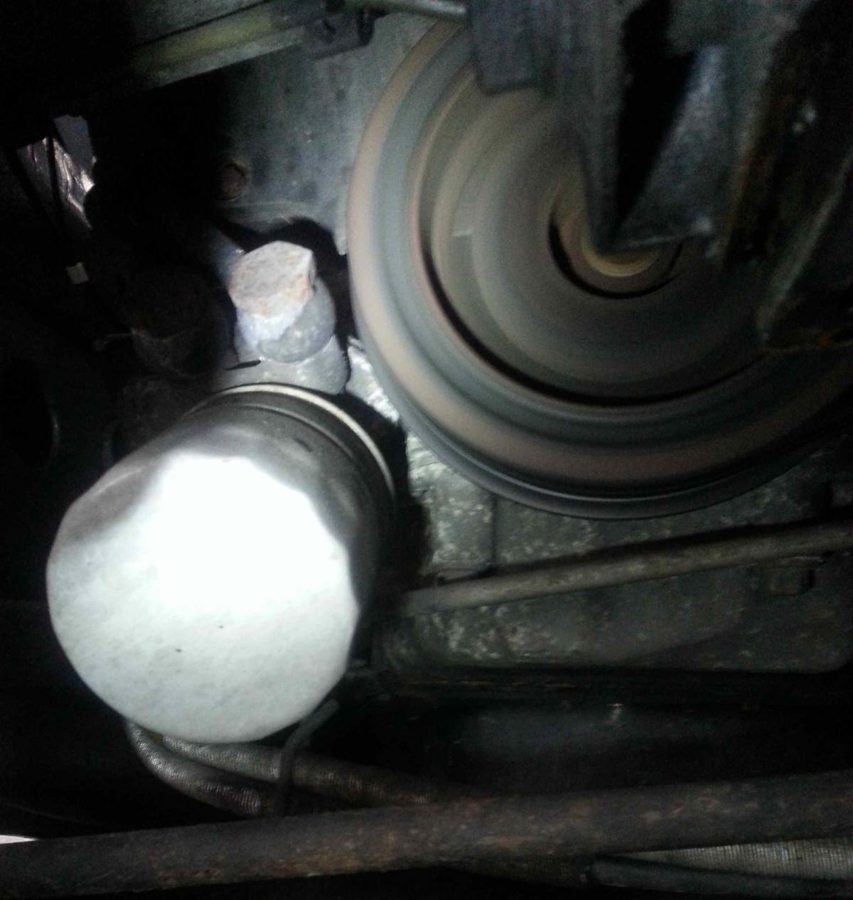
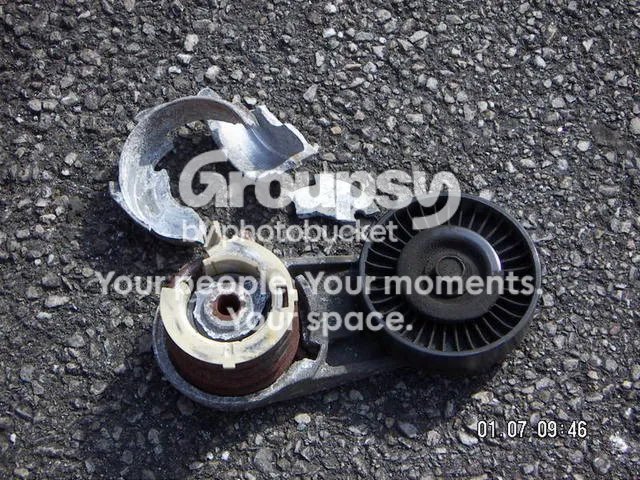
- Remove the belt and run the engine. The alternator is driven from the crank pulley through a tensioner and an idler pulley, so one of those is more likely than the crank pulley to be rattling. Take the belt off and start the engine to see if the noise has gone. One owner did, and found no noise.
- Spin the pulleys by hand. Apart from the crank, you should be able to feel or hear a bad bearing. Wait a few days to see if the noise returns after refitting the belt.
- Check the tensioner moves freely. One squealing belt turned out to be a seized tensioner. When you pull the tensioner down it should spring back easily, otherwise it needs replacing.
- If it is losing the belt or burning, change it ASAP. One owner's belt was running all over the place, burning, with smoke coming from the belt, because the tensioner had failed. Fit a new belt first and test, and change the tensioner too if that doesn't fix it.
- Early squeaks. One owner noticed a twittering sound when cold, as if the belt was slipping a little, and wondered whether the idler bracket could be the cause. The thread doesn't answer.
A modification one owner made
One owner took off the tensioner and the idler pulleys and ran a much shorter belt, which he says saves 3.2 kg. He had to build a manual tensioner for the alternator, and checks the belt tension every 5,000 to 6,000 km. He thinks a generic Poly V 5PK 903 or 905 is the right length. Another owner points out this loses the automatic tensioner, which makes it less fit-and-forget and may need adjusting as the belt stretches. This is a one-owner modification, not a recommendation.