
Draining the oil (both engines)
- Warm the engine up and switch it off. Warm it to running temperature, because the oil drains better when it is at least warm.
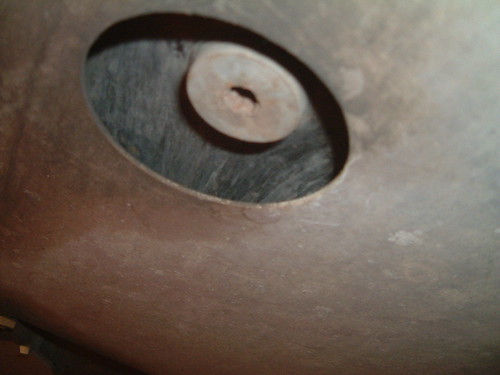
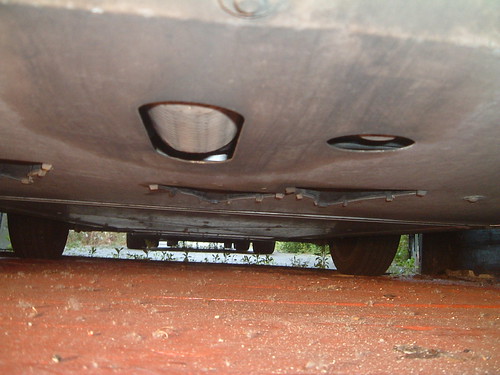
- Get access to the sump plug. Later cars have a cut-out or hinged flap in the undertray, so you can reach the plug without taking the tray off. The very earliest cars have no flap, and the whole tray has to come off on those. One owner took off the rear tray and loosened the first few bolts of the main one so it hung down, and made a funnel out of an old oil carton. Another used a milk carton as a catch tray with a hose into a container.
- Take out the sump plug. The Turbo thread (2005) says it is an aluminium plug with a Torx 45 head. The NA thread says it is a 15 mm bolt. The threads don't say whether that is a real difference between the engines, so check what fits before you start. It has a Dowty-type sealing washer. Turn it anticlockwise, and keep the tray ready, because the plug and the oil arrive at once and access is tight.
- Leave it to drain. About ten minutes is typical. Some owners leave it to drip for hours.
- Refit the plug before you add any oil. Forgetting means the oil goes straight out of the bottom.
Sump plug washer
The TIS says to replace the sealing washer every time. One owner runs a couple of turns of PTFE tape around it to make sure of a seal. Another says there is "no real need to replace" it. The TIS also asks for new metal gaskets on the NA filter cap, and owners say nobody bothers. That is what these owners do, not a recommendation.
Turbo: changing the filter
- Reach the filter from the rear wheel arch. Take off the driver's side rear wheel, and the filter is accessible from there. Several owners say the tray can stay on. One puts the car back down on the jack until it is level, with support under the wishbone, and says the filter is behind the suspension upright. It is to the right of the sump and slightly above.
- Put newspaper and a thick wad of kitchen towel below the filter before you unscrew it. Quite a lot of oil comes out of it, so have plenty of old rags.
- Undo it. Once it moves it can be turned by hand. If it doesn't:
- A claw wrench (about £8) worked for one owner whose filter was very tight.
- A strap spanner or a strong grip is another option.
- One owner's wrench broke. Pushing a screwdriver through the filter and twisting only cut the metal of the filter. A cap-type remover with a 1/4" ratchet drive took it off in seconds.
- Another owner's view is to stab a screwdriver through it and turn, so experiences differ.
- Fit the new filter. Smear the rubber seal with fresh oil and screw it on until firmly hand tight. Don't overtighten. If you use a torque wrench, the figure is 15 Nm.
NA: changing the filter
The NA filter is a cartridge. It is not a canister that bolts on, but is fitted in a housing cast into the engine, and it is reached from above, in the gap between the engine and the bulkhead. The cap is aluminium, with a hex on top. The cartridge comes out upwards, so you only need to remove the plastic inlet trunking between the top of the engine and the bulkhead. Disconnecting the air box tubing makes it easier, or possible.
Getting the cap off
- Socket. Owners say 32 mm. The GM tool, KM-6150, is little more than a socket, and a copy of it sold as the Laser 6037 is the same thing. A crow's foot version has also been used. In 2007 two owners described a 1/2" square drive into the top of the housing instead. The threads don't explain the difference, so look at your cap.
- Clearing the obstructions. The inlet manifold and a metal pipe can stop an extension bar going in at any angle, and one owner wondered whether some manifolds are shaped differently. A foot-long 1/2" extension was needed on one car, because a 6" one fouls on other parts. Others use a knuckle joint on the end of the extension, or a 3/8" wobble bar with a long extension and a short 32 mm socket.
- The cap was over-tightened by a previous owner. This is the usual problem (see the next part).
You can change the filter without draining the oil, but the new oil mustn't be contaminated by what is left in the old filter. One owner had drained and refilled his oil before he managed to move the cap. Another got fed up with the undertray and used an oil sucker through the dipstick tube instead.
Refitting the cap: leave the oil cooler ring alone
Under the cap is a ring that carries the oil cooler feed, sealed to the housing by two thin seals. Normally you unscrew only the cap. The ring is meant to stay in place, which is why the TIS has a high torque for the ring and a low one for the cap. The low cap torque is what scares owners into overtightening it, and if you use it you should never have a problem again.
- Cap: 25 Nm (quoted from the TIS). Some owners say 20 to 25.
- Ring: 120 Nm (quoted from the TIS), or 125 from memory. Two owners went to just over 100 because of the access.
The cap has its own O-ring, in a groove, and it seals with very little torque. It is a different part from the one supplied with the filter. One owner doubted the O-ring existed, so this was disputed. Several owners found the one in the filter box too big. One cut a section out of one and superglued the join. Another reused his worn one with PTFE tape on the threads. The O-ring lasts about three changes, and leaks mostly in winter. Replace it if you can.
If the whole assembly comes out with the cap
It happens when the cap has been overtightened or the ring has worked loose. The oil cooler collar in the housing can also unscrew as you undo the cap, and the ring tool can hold it. Owners then used this approach:
- Splitting it. Hold the housing in a vice with the proper spanner on the ring. One owner had it horizontal and clamped, with a 32 mm ring spanner on the cap and strong taps with a hammer. Others used a vice, a spanner and a breaker bar. One left his in penetrating fluid overnight after a lot of force failed, and it came undone the next day, but that may have been a coincidence. Another was unable to separate his, and suspects it needs heat.
- New seals. Vauxhall no longer sells the two rings, so use aftermarket ones. One owner bent a new gasket and used an old one instead, and it leaked from the underside of the housing when he drove the car. Graphite seals compress well, and a bent one that isn't torn is worth using in preference to the old metal ones. As a last resort, metal rings that aren't bent can be refitted with high-temperature gasket sealant.
- Seating. The steel rings must be in exactly the right position before tightening. Clean the threads and use thread lock. One owner put oil on the seals before assembly, and under-torqued the lower part slightly, because the higher torque seemed to rip the seals. Another couldn't tighten the ring properly without the special tool.
- Then refit the cap with the correct O-ring and only the light cap torque.
One owner tightens the ring by hand with the 32 mm key every time and has had no leaks. That is one owner's method, and not the torque in the TIS.
Refilling and checking
- Pour the oil in slowly through the filler cap, with a funnel. Check the dipstick often, because it takes a while for the oil to reach the sump, and add less as you approach the maximum.
- Check for leaks at the sump plug and filter.
- Start the engine, let it tick over, and check for leaks again. The level drops slightly as the new filter fills.
- Leave it a few minutes and check the dipstick again. Check again after a drive over the next day or so.
- Dispose of the old oil and filter properly.
How much oil
The owners' figures don't agree, and the threads don't have a source that settles it.
- Turbo: 4.5 litres (also from a handbook). One Turbo took exactly 4 litres.
- NA: 5 litres, 5.2, 5.5 in the handbook, and 5.25 on one car, which sat right on the dipstick. Another owner had read that the capacity is 5.5 with 0.5 left in the engine, so 5 are needed. A further view is about 4 in the sump plus 0.5 for the filter.
- 4.75 litres including the filter is the figure from a TIS bulletin, according to a Z22SE site. One owner says the service book had a misprint.
Because of that, fill to the dipstick instead of by the can. Warm the engine up, switch off, wait a few minutes, and aim for the 3rd or 4th notch, with each notch about 175 ml. Overfilling is harmful, so the level shouldn't be over the maximum. One car showed the level way up the dipstick after standing overnight, but right when warm. Two owners had recently found their cars overfilled.
Which oil, and how often
The threads give no official specification. Owners mention 15W-40 semi-synthetic as a minimum, Mobil 1 0W-40, Halfords 0W-40, 5W-30, and Motul 300V. One owner says semi-synthetic and fully synthetic shouldn't be mixed. On intervals, one Turbo owner changes at 3,000 miles, and another changes every 4,000 to 5,000 miles because he tracks the car. The service book interval is covered in Service book continuation pages.
Flushing the engine
Several owners say a flush is a waste of time and just drain and refill. One adds a can of flush to warm the engine before draining. Others object, saying it is untested and worrying for the turbo seals, and that overfilling with thinned oil can do damage. The suggestion if you really want to flush is to drain and fill twice with fresh oil.