
This is a write-up of changing the fuel pump through the inspection panel above it. Later posters added a lot of detail, particularly on cutting the hatch bigger and getting the circlip and seal back in. If you are replacing the whole tank rather than just the pump, see Fitting a Pro-Alloy fuel tank. That guide moves the pump housing across to the new tank and refers to this one.
Preparation
- Disconnect the battery.
- De-pressurise the fuel system using the valve on the fuel rail.
- Remove the passenger seat and the rear speaker panel (the plastic bulkhead trim). This applies to left-hand drive cars too: the pump is in the same place, and you still need to remove the passenger seat to take off the trim.
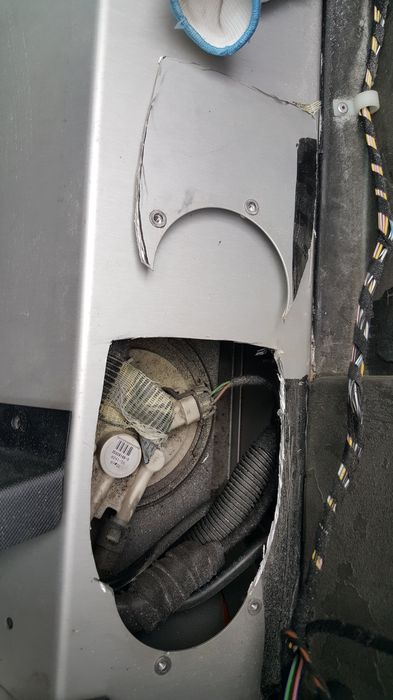
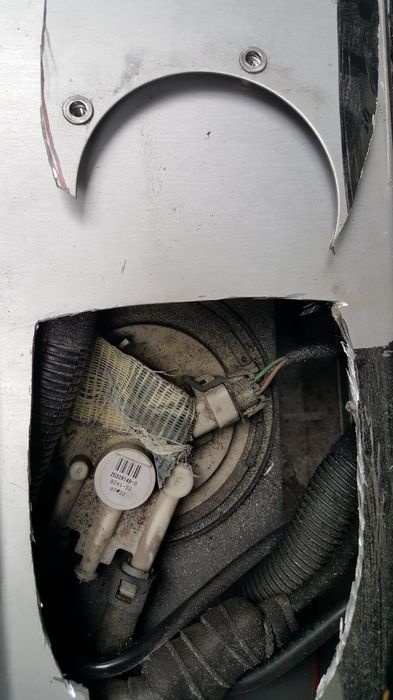
Making the inspection hatch bigger
The standard hatch is too small to work through, so most people enlarge it. Go no bigger than you need. The original author says his own cut-out was really too large and too close to the edge, and a smaller opening is advisable. "Measure twice and cut once," he says, "and do not go too close to the edge."
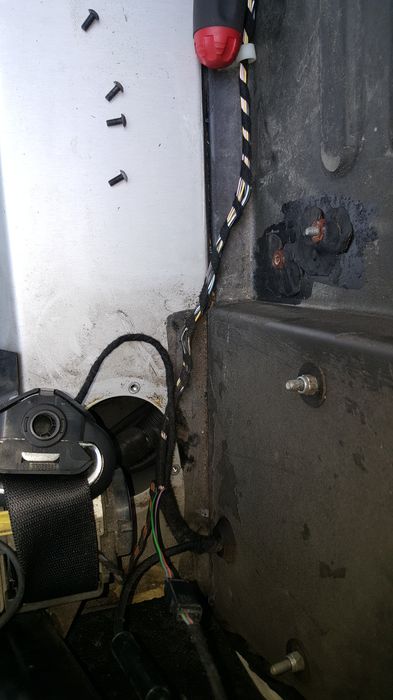
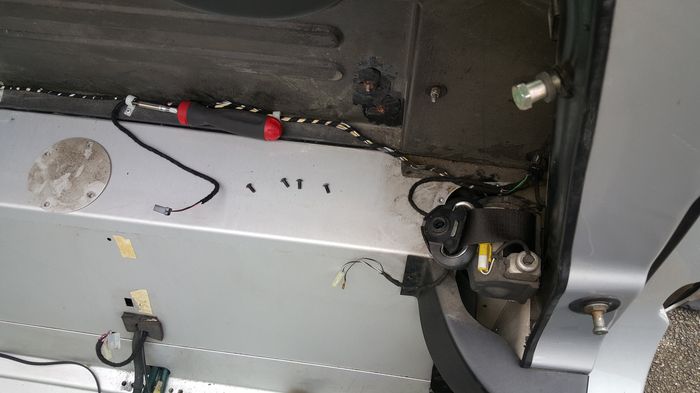
- Take off the seat belt inertia reel to get at the panel. The casing isn't welded to the roll bar: under the four screws is a large bolt (look with a torch). The thread's bolt size answer was T45 or T50, and it turned out to be a T50.
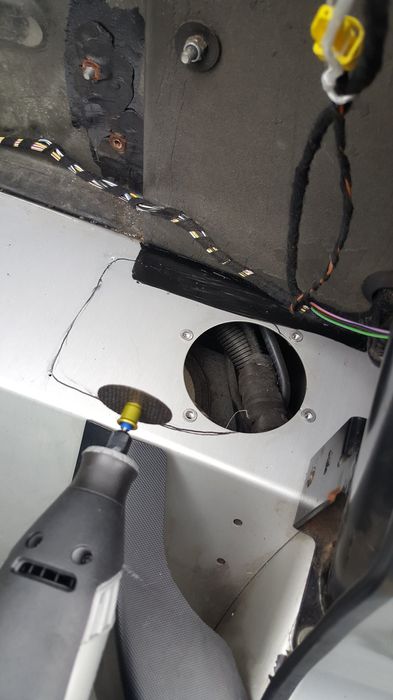
- Remove the original inspection cover, then feel underneath for the wiring loom. It is taped to the underside and is sometimes right where you need to cut.
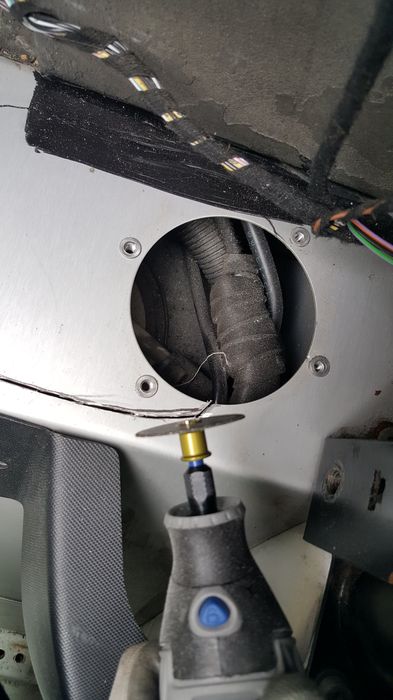
- Mark the new outline. Drilling 10 mm holes in the corners and cutting up to them gives a neater, and probably stronger, result than square cuts. Round off the corners, because square ones can let the panel fold or splay in an impact.
- Cut with a Dremel, an angle grinder with a thin cutting blade, or a nibbler. The panel is aluminium, so there are no sparks. The grinder leaves a cleaner edge than a nibbler, though a careful nibbler works too. Jam a rag in the gap so the swarf doesn't go everywhere.
Covering the new hole
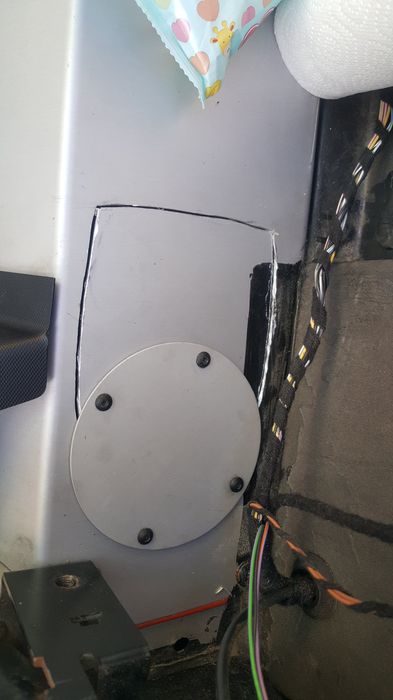
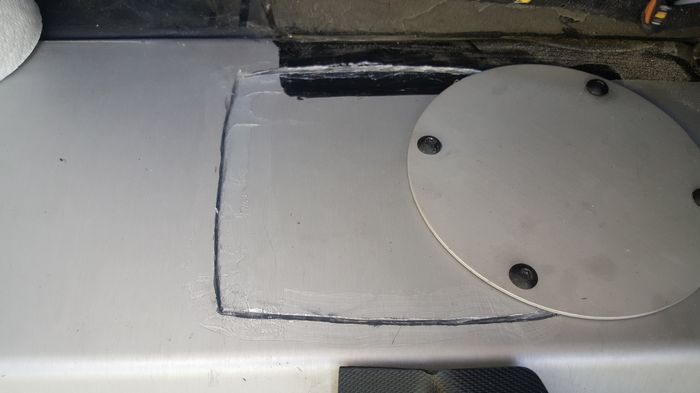
The cover needs to be thin, because it fits underneath the speaker and shelf trim. Owners did it in different ways. One makes a new cover panel fixed with rivnuts, so it looks factory fit. Another bolts an oversized plate over the hole and down the side with aluminium rivnuts, with a bead of silicone in case any fumes or smell come through. A third refitted the cut-out piece with heat-resistant silicone sealant to stop it vibrating and adds strength, then taped over it. Thicker plates may stop the trim fitting.
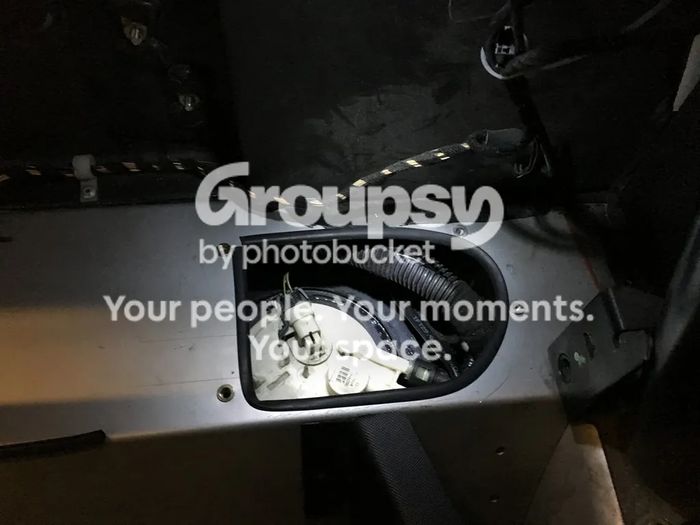
Removing the pump housing
- Unplug the connector from the pump housing.
- Remove the two fuel pipes. They are held on by spring clips: press the upper and lower clips and slide the pipes off. One member posted a separate thread on getting these off without force; the thread links to it.
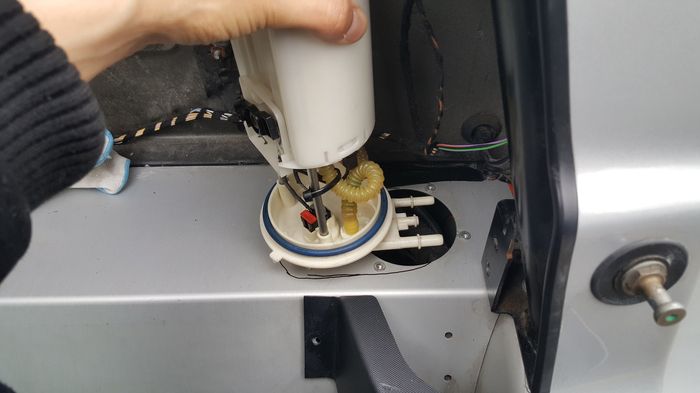
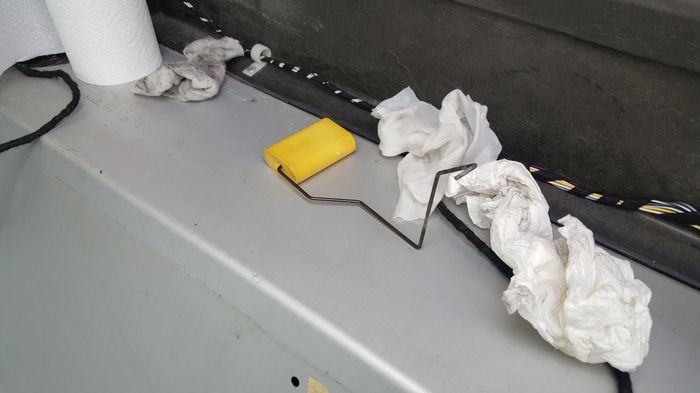
- The housing is held in by a very large circlip. Take it off, then withdraw the housing, turning it so the fuel gauge sender fits through the hole. Be careful with the sender float. One owner dropped the sender metal arm into the tank, though they fished it back out, and fuel evaporates quickly.
Changing the pump
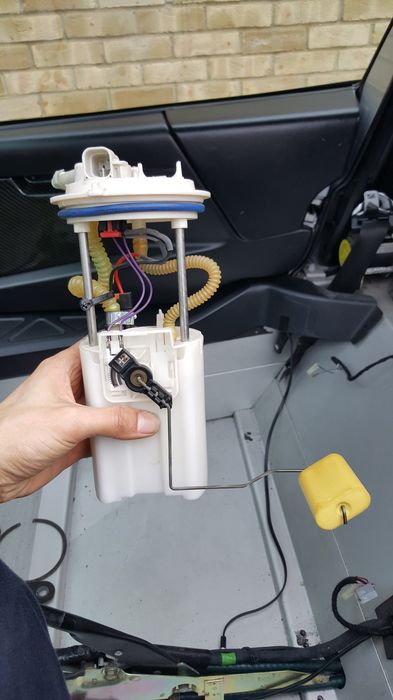
- There are two clips holding the lid on the housing. Prise them open with a screwdriver. The fuel return pipe has to be pushed to one side for the housing to separate.
- Open the housing and remove the old pump. Take care of the fuel hose if you plan to reuse it.
- Note the wiring colours: black to black, grey to red.
- Check the old filter and fit it to the new pump. One owner's was surprisingly clean, but another owner's was clogged with black debris, along with the inside of the housing.
- Remove the grey and red end caps on the new pump before fitting it. The pump slides into the housing. It isn't otherwise fixed, so add a cable tie to hold it below the white clip on the housing.
The fuel hose
Getting the hose onto the new pump is the most complained-about step. The advice is to reuse the original convoluted hose, trimmed from the old pump so you keep as much as possible, and bin the new hose, which really doesn't fit. Warm the end with a hot air gun and slide the new pump onto it. Others found:
- A hot air gun can make the hose too soft, so it mashes up when pushed. Hot water and a silicone sealant nozzle to stretch it worked better, and a new hose is only about £2.
- One owner stretched the narrow end by leaving it in boiling water, then pushing in larger and larger drill bits (blunt end first), letting it cool on each so it remembered the size.
- One owner used 8 mm internal, 13 mm external neoprene fuel hose instead, after the original wouldn't go on.
Wiring
When you cut the wires, offset the joins so they don't sit together. Solder them and cover each with heat-shrink sleeving. Polyolefin is meant to resist petrol and not break down over time. The thread says the connectors don't need to be sealed. Petrol isn't a conductor, and it is the fumes that ignite, not the liquid, and there is no air for combustion inside the tank.
Refitting
- Refit in reverse order. The fuel pipes clip straight back on, and don't forget the wiring loom plug.
- Blue seal and circlip. The big blue seal is the main trouble. One owner's seal fell into the tank, and another's had swollen the second time. You need a new blue seal every time with a Pro-Alloy tank (it's easier with the standard one), and putting it in the freezer overnight first helps a lot. Lubricating the blue O-ring with something soapy is also suggested. Make sure the seal isn't twisted. The circlip on a Pro-Alloy tank is "a proper pain", according to two owners.
- If the housing won't go all the way down, remove the black cable tie that blocks it from compressing fully. It's normal for the assembly to compress.
- Reconnect the battery and fit the cover plate, then the trim, seat and so on.
After fitting: what to expect
- There is fuel pressure for only a few seconds when the ignition is first switched on, and then only while the engine runs. So a dry rail with the engine off is normal.
- An uprated pump is slightly noisier than the standard one, though not noticeably so with the engine running. One owner wondered if a low tank, with the pump not fully submerged, made it noisier.
- One owner heard a hiss from the regulator and a high-pitched hum from the pump straight after fitting, before the trim was back on.
If it won't start afterwards
The thread has a long run of diagnosis from one owner. The pump is not always to blame. In the order they were suggested:
- Check the fuel pump relay (swapping with another relay at the front made no difference for one owner).
- Is the hose onto the pump secure (see above)?
- The pins inside the plug on top of the pump can spread and lose contact. One owner pushed the four pins back in with a tiny screwdriver, which cured a car that primed, started and then cut out.
- If the car starts for a few seconds and then dies until an ECU reset, think immobiliser. One owner's scan tool showed code P1612 (loss of IPM serial data). The cause was poor or corroded connectors on the immobiliser unit on the steering column. Removing and refitting it cleaned them up.
- A fuel cut-off switch that trips is another thing to rule out. Jumpering across it made no difference in that case.
Other owners' warnings
- One owner blew two pumps, which he put down to loom damage, and then had a float that stuck at 16 litres because the plastic clip holding the sender had broken. He fixed it with a cable tie on the third attempt.
- A rivet dropped into the gap around the tank eventually worked its way out, but expect it to rattle around for a while.