
On a Turbo with remote central locking, the CDL module is the unit that takes the lock and unlock signals from the alarm and powers the door motors. It is the most common cause of central locking faults. The photos carry the Photobucket watermark.
Where it is
On the far right of the area under the main dash, behind the light switch cluster, on a metal panel. It connects by a multipin plug, so swapping it is just a case of unplugging the old unit and plugging in the new one.
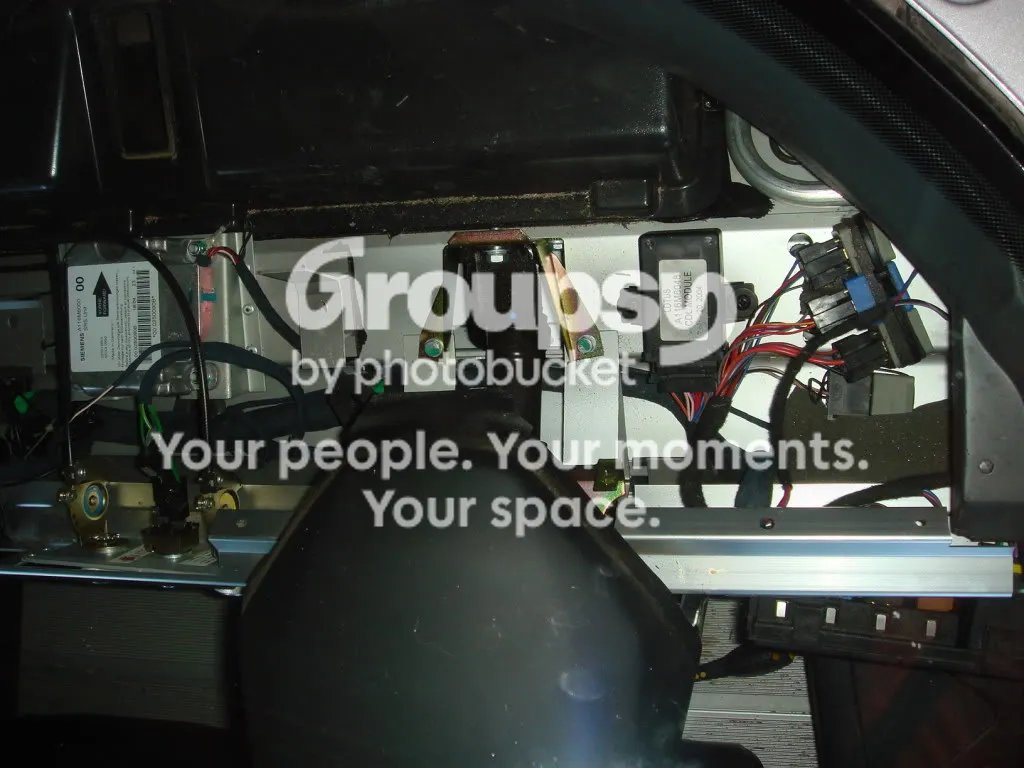
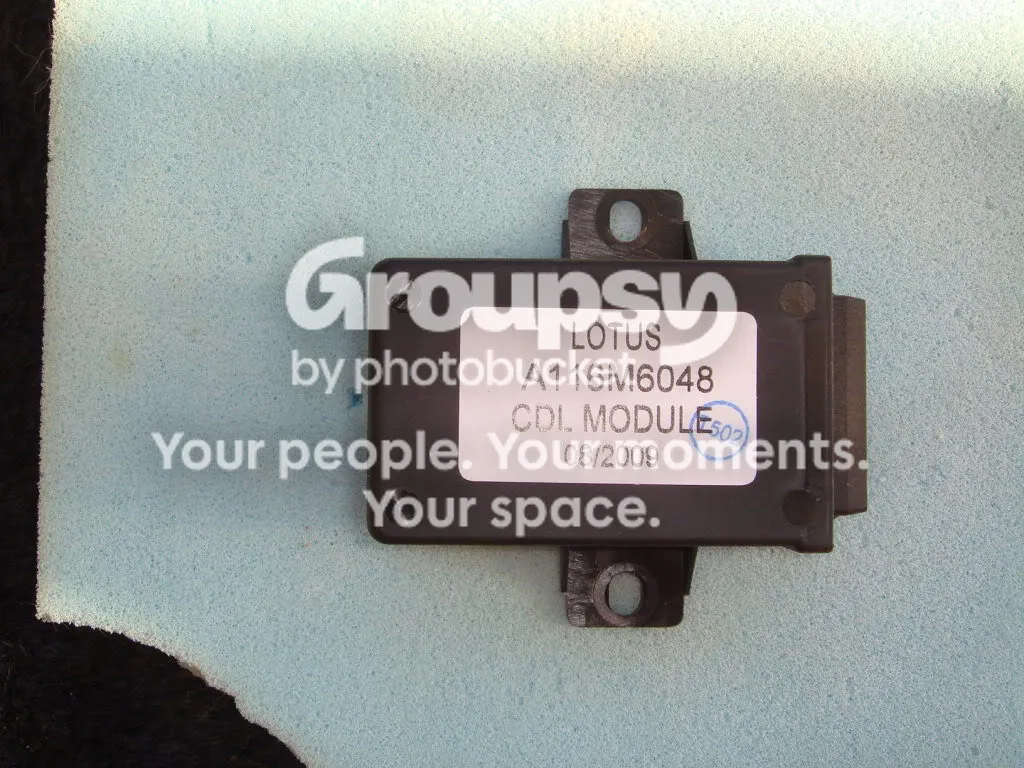
Two ways to reach it
Through the light switch gap (no dash removal)
- One owner (2013) did the job through the light switch opening in about ten minutes. He left the old module in place, because it is bolted down and weighs almost nothing, and stuck the new one on top.
- In 2014 another owner confirmed it was possible, saying it was a squeeze with normal-sized hands and to beware sharp aluminium corners.
- An earlier owner (2011) said there is no room to get a hand through the slot unless you have tiny hands or a child. Owners differ; it seems to be tight but possible.
With the dash top off
- The dash top is held by six self-tappers, and two of them are hidden behind the light switch cluster. The owner who did this only replaced four of the six, as the other two are almost impossible to get back in place.
- See Dash top removal. Owners disagree on whether the instrument panel has to come out. One says you only need to remove the radio and the two dash plates, taking about 15 minutes. Another found the dash top wouldn't come off until the instrument panel was removed, because of a lip. One owner's trick: pull the binnacle towards you while pushing up on the dash top to free its rear tab from a metal C-shaped groove, and wait for a bang.
- Disconnect the battery first. If you remove the steering wheel or airbag, see the warning in Fitting central locking.
What a new one costs
Prices depend on the year, so use these as a guide only. The Lotus part is the same module. Owners found the Lotus price (about £48 in 2010) lower than Vauxhall's, and one found a new sealed unit for £20 from someone who had bought it and traded his car before fitting it. One owner reported paying about £70 for a new unit, from memory.
Repairing a failed relay instead
In 2014 one owner found the module's relays had failed and fixed it himself.
- Take the module out and open it. The two black boxes on the circuit board are the relays, marked HG 4117 012-Z1.
- Measure the coil resistance across each relay's coil pins with a multimeter. A good coil read about 130 Ω (the datasheet figure); the failed one read open circuit. The board is coated, so push the probes fairly hard to get a reading.
- Unsolder the failed relay and fit a replacement with the same coil and contact arrangement. The owner used a TE Connectivity V23072C1061A303 (RS 308-0683) at £3.92, refitted the module and reports everything working.
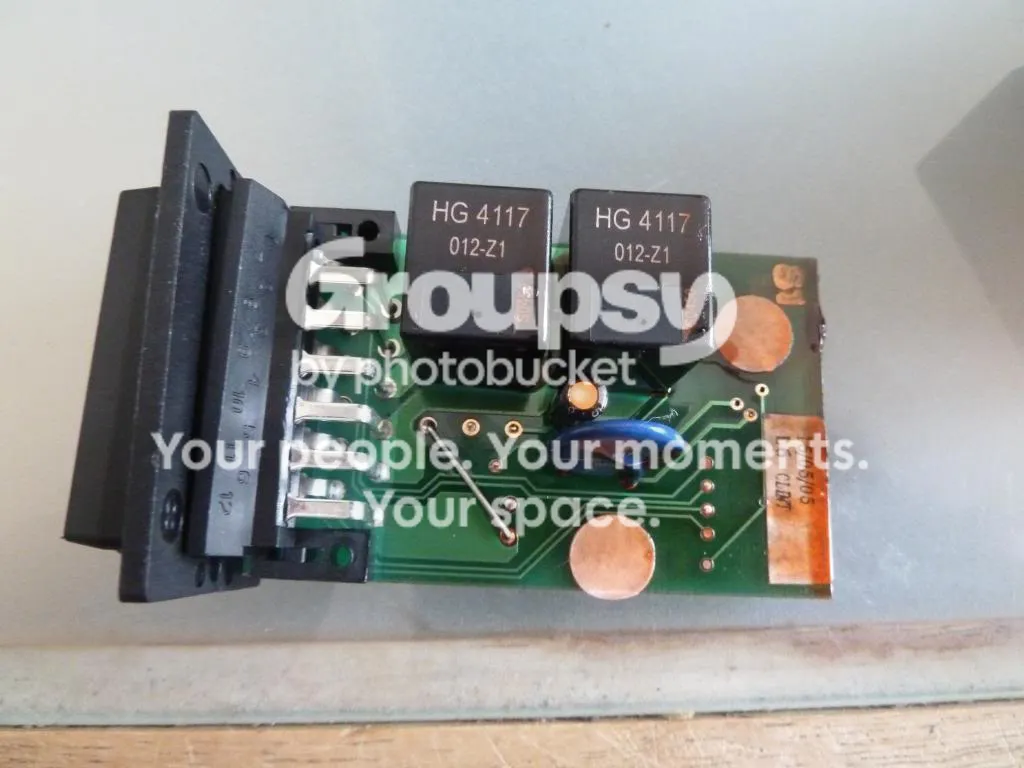
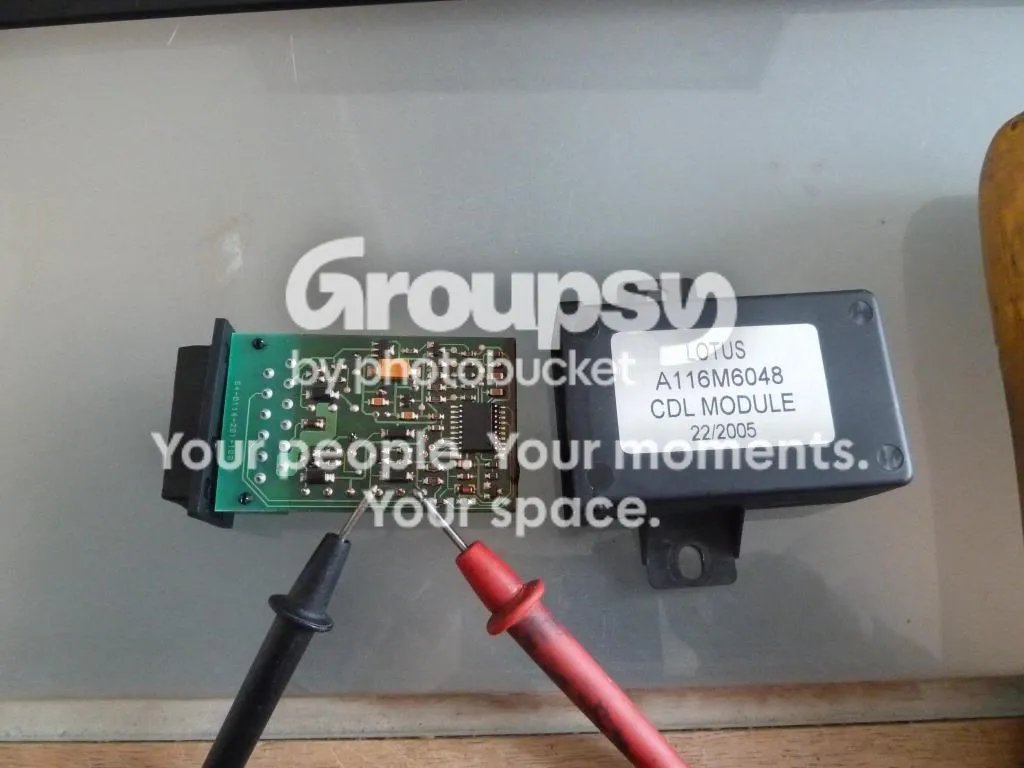
The owner points out it is unusual for a relay coil to go open circuit unless power has been applied continuously, which overheats it. That is his opinion, not a diagnosis. Only one repair is reported, so check the datasheets yourself.
A similar idea for the alarm unit didn't work out. One owner opened his alarm unit in 2017 hoping to replace a relay (HFKM 012-SHS) for about £15 instead of buying a new unit at about £150, but he ended up buying a new alarm unit, and that fixed the fault.