
This was written in 2008 after reading a lot of snippets about how swapping a rack takes much wriggling and swearing but is easier the second time. The aim is to save a first-timer the trial and error. Vauxhall reckon parts of the job take two people, but the author did it alone. Unless you are happy to pay for tracking afterwards, he suggests first making a laser gauge, which lets you set the tracking back to where it was.
The pictures carry the Photobucket watermark. Left and right are as the author gives them.
1. Make the laser tracking gauge (optional)
- Buy a cheap laser pointer (under £5 in 2008) and mount it on something rigid. The author used a length of aluminium U-channel, cut to span the rim of a front wheel.
- Put the pointer on top of the channel with the beam roughly parallel to it. No need to be too accurate, and rotating the pointer adjusts the angle. Fix it firmly with cable ties or jubilee clips. Nothing can move, so he added hot melt glue.
- Arrange for the laser to stay on, for example by pushing the button in until it sticks, then switch it by unscrewing the battery cap.
- Record the existing alignment. Park the car about 20 feet from a wall or garage door, square to it, wheels straight ahead (the further back the more accurate, and 15 feet or more is fine). Mark the ground where one wheel sits, so you can put the car back later. Hold the channel horizontally on the first wheel rim, level with the wheel centre, and get a helper to mark the spot on the wall. Repeat on the other wheel.


The author added later (2008-12) that the wheels must be pointing accurately straight ahead both when you take the first measurement and when you set the tracking again. See the laser-on-tyre step below.
2. Wheel sliders
Make a pair so the wheels turn easily with the car stationary. Sprinkle washing-up liquid inside a thick carrier bag, sandwich the bag between two pieces of cardboard, and make another. Put one under each front wheel, and a two-year-old could then turn the steering wheel.


3. Removing the rack
- Handbrake on. Turn the steering wheel fully clockwise.
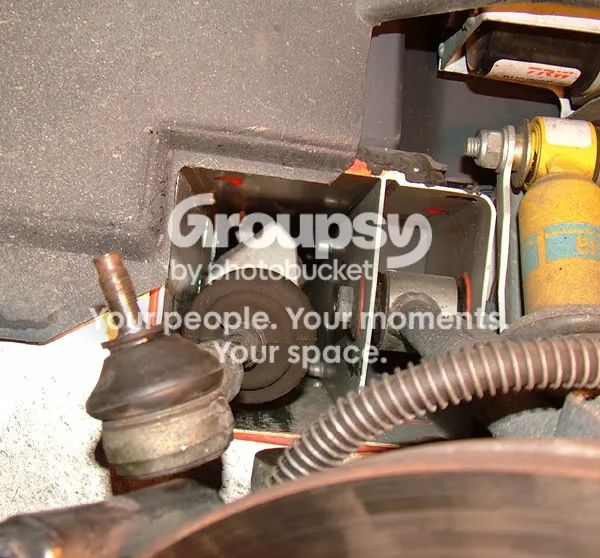
- In the left wheel arch, undo the track-rod end nut with a 17 mm socket, then tap (don't bang) the end from underneath with a hammer and it should pop out. If the end turns with the nut, clamp it to the arm with mole grips so you can undo the nut. If tapping doesn't free it, use a splitter. A cheap screw-type one from Halfords worked.
- Jack up the right-hand side, remove the front wheel, and undo and separate the other track-rod end in the same way.
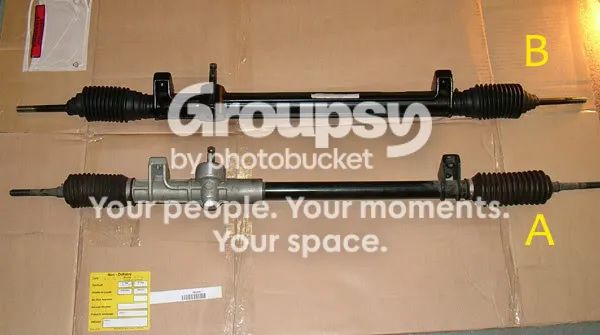
- Check which of two racks you have. Rack "A" comes out with no trouble because the casing under the spigot is narrower. With rack "B" you might be lucky, but most likely you will spend half an hour twisting and swearing and it will still be in there. (The thread doesn't say which cars have which.)
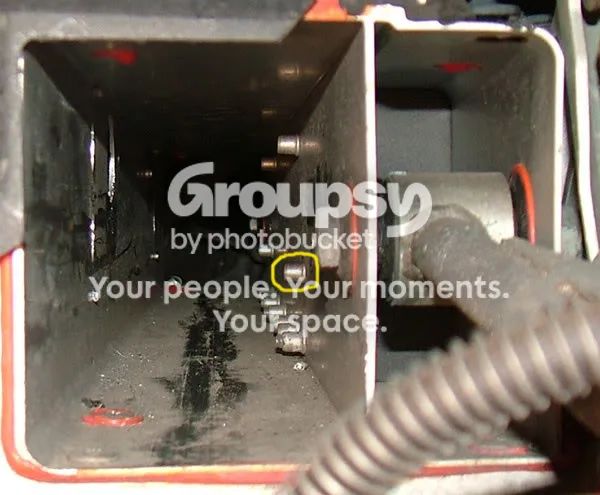
- If you have rack B, find the Rivnut circled in the photo. Put the end of your large flat screwdriver at its base and hit the screwdriver with a hammer. The Rivnut isn't used, with no bolt inside, and a couple of clouts will snap it off to give more room. One owner (2009) found that on his 2001 NA this Rivnut held the top bracket of the heater assembly, but he banged it out anyway.
- Sit in the driver's seat with your legs out of the door and lean under the dash, with your 13 mm and 17 mm sockets and the pair of 13 mm spanners.
- Use the two 13 mm spanners to remove the bolts from the intermediate shaft universal joints between the rack and the column. There are two types: one with two joints and a separate shaft, and one with one joint welded to the shaft. Just remove as many bolts as you come across. Don't try to pull the shaft out yet.
- The rack is bolted to the floor through a black steel bracket on each side. The bottom bolt is 13 mm and the top is 17 mm. Remove both bolts on both sides.
- Pull the intermediate shaft up its splines towards the steering wheel until it slides off the rack spigot, and the rack will flop back into the tunnel.
- From the right-hand arch, look up the tunnel, twist the rack until the spigot clears the hole in the floor, and pull it out. If you didn't knock out the Rivnut earlier, do it now, because it makes refitting easier.
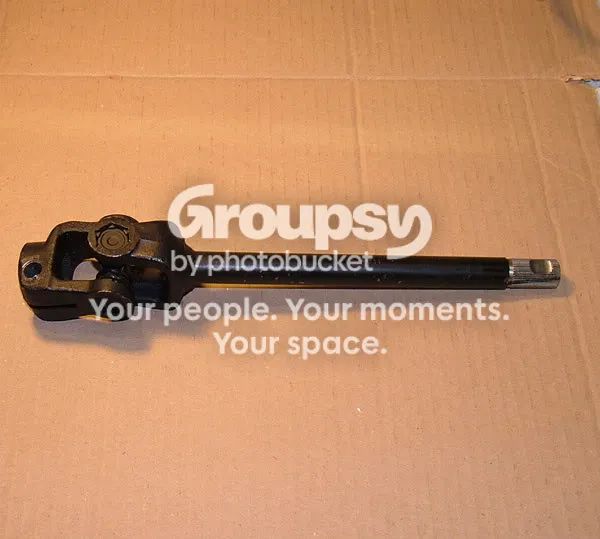

Check the universal joints while the shaft is out. The author found them poor quality. Clamp one end in a vice and twist the other with mole grips: you will probably find slack. The mole grip handle is near the radius of the steering wheel rim, so it gives an idea of how much play they add at the wheel. Some new replacements weren't great either, and he returned some and used a pair from a scrapyard that turned out best he had seen.
4. Transferring the track-rod ends
- Lay the old rack on a sheet of cardboard. Use a square to line up the edge of each track-rod straight down onto the card and draw a line at each end.
- Count the threads showing past each lock nut, add the two numbers together and write the total on the cardboard.
- Slacken the lock nuts and take both track-rod ends off.
- Screw both lock nuts onto the new rack, leaving half the total number of threads showing on each.
- Screw both track-rod ends on until they meet the lock nuts.
- Lay the new rack on the cardboard, line one end up with its line, and check how far out the other is. Adjust by turning both track-rod ends (not just one) until they match both lines.
- Tighten the lock nuts. (The tips for finding the rack centre or marking the spigot are of no use once the rack is in the car, so forget them.)
- Move the rubber gasket from around the spigot of the old rack to the new one.
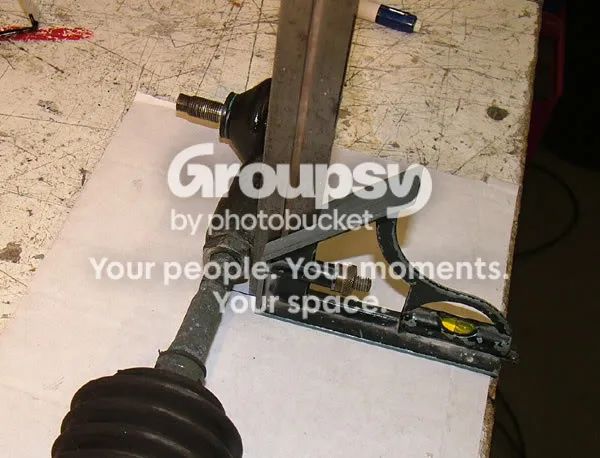
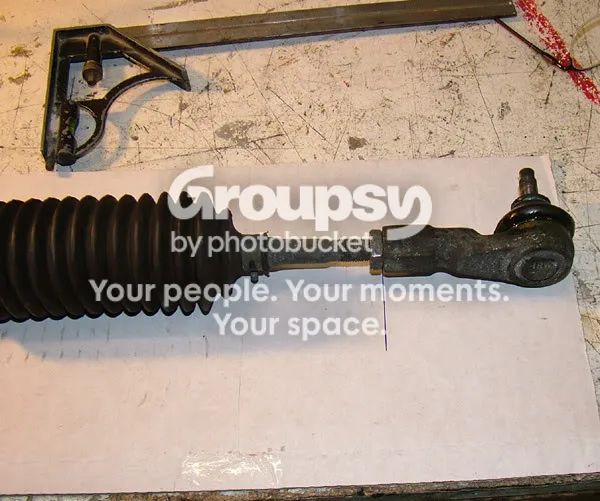
5. Refitting
- Lay the rack in the orientation it will have in the car and twist the track-rod ends to point vertically up, so they don't snag as you put it in.
- Slide the rack into the tunnel until the spigot lines up with the hole and twist until it drops in. Some help is handy.
- Starting on the left, go back under the dash with the two small screwdrivers. Use them through the bolt holes to lift the rack until one screwdriver locates the top hole in the rack through the top hole in the floor.
- Put the 13 mm bolt in the bottom and tighten it gently, then screw the 17 mm top bolt in a few turns.
- The right side is easier because the left bolt pulls the rack square to the tunnel. Put both bolts in a few turns, then go back to the left and slacken the bottom bolt until only a few threads are holding. The rack is now fairly loose in the tunnel (you need the slack shortly) with all the bolts in.
- On the right side, put the track-rod end into the arm and tighten the new Nylock nut to 30 Nm. If the end turns, use mole grips to press it into the arm.
- Push the wheel round to the right, and refit the left track-rod end the same way.
- Refit the right wheel and lower the jack.
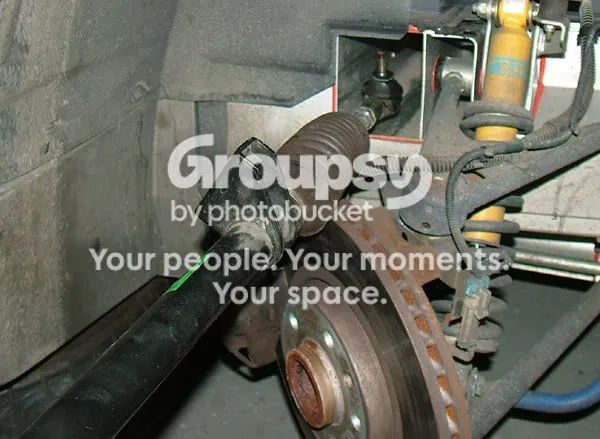

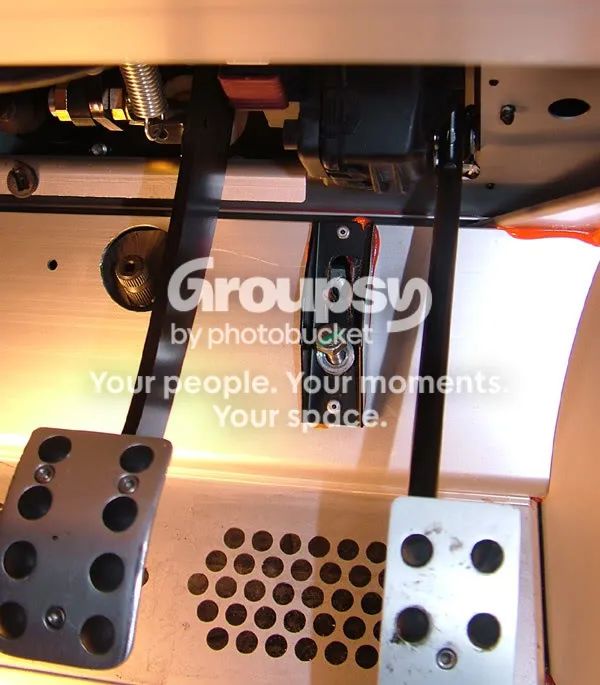
6. Straighten the wheels and centre the steering wheel
- Get the wheels pointing straight ahead. With the laser tool you can point it backwards so it hits the rear tyre, then turn the steering wheel until the dot hits the tyre at the same place on both sides.
- In the car, centre the steering wheel and hold it still with your knees. Tape it to the column cowling at the rear of the wheel. Enough tape, properly stuck down, keeps it clamped in place.
- Back under the dash, put the intermediate shaft and joints together if they came apart. There are flats on the shaft, so the bolt holes in the joints have to line up with them before the bolts go in. Put all the bolts in but not the nuts.
- Engage the bottom of the intermediate shaft on the column spigot. If you need more room, take the bolts out of the joints and slide them up the splines. If it still isn't enough, take out the instrument binnacle and release the three bolts holding the column mounting bracket.
- Tighten all four rack bolts: 22.5 Nm for the bottom ones, 45 Nm for the top. The author suspects there ought to be thread lock, but his had none.
- Check you have 1¼ turns each side of centre on the steering wheel.
- Fit the nuts to the intermediate shaft bolts and tighten.


7. Setting the tracking
If you made the gauge and recorded the alignment first:
- Put the car back where you made the first measurement, with the sliders under the front wheels, and wind the driver's window down to reach the wheel.
- Hold the laser on the right-hand front wheel and turn the steering wheel until the dot hits your original mark.
- Hold the laser on the left wheel and see how far the dot is from the original mark. If you counted the threads carefully, it should be within 2 to 3 inches at 20 feet.
- If you need to adjust, start on the right. Turn the steering to the left until you can see the right track-rod end, and slacken the lock nut.
- Use a spanner on the flat part of the track-rod to turn it. Clockwise, looking at the rod from the track-rod end, moves the front of the wheel in towards the centre of the car and reduces the distance between your dots. You only need to make half of the adjustment on this side, and the same on the other, to keep the steering central. From memory, half a turn each side is worth about 1½ inches between the dots.
- Repeat the check and adjust until the dots are the same distance apart as at the start.
- Drive backwards and forwards about 10 feet until you are driving straight, then look at the steering wheel. If it's a bit out, adjust both rods in opposite directions. A quarter turn on the rods is about 5 minutes of a clock face on the steering wheel.
- Check the tracking again, then tighten the lock nuts.
The author's verdict: about 4 hours including tea breaks, though you will feel it afterwards. See also the rear toe links guide and the torque values page.
Additions from other owners
- Check the pinion preload (2008). Before fitting a new or reconditioned "B" style rack, check the pinion preload. The rack should need 12 to 16 lbf (50 to 70 N) to move it, pulling on one track-rod in a smooth, constant movement from one end to the other. You adjust it by loosening the lock nut on the back of the housing and turning the threaded plug that presses a thrust pad against the rack bar and pinion. They are usually well out when delivered new, and the poster wasn't sure whether the "A" type can be adjusted. Nobody else in the thread confirmed these figures, and another owner, who had just fitted his, said he wasn't going to take it out again to check and that it felt much better than his seven-year-old original.
- Result: one owner hadn't realised how sloppy the old rack had become, and bump steer on lumpy roads improved a lot. He had also fitted revised raiser plates, so he couldn't say which did it.
- Lock to lock (2012): the OEM rack is 2.75 turns lock to lock and the quicker one is 2.5. The check of "1¼ turns each side of centre" above adds up to 2.5, which doesn't obviously fit the OEM figure. The thread doesn't explain this, so count it on your own car before and after.
- Intermediate shaft room (2012): one owner's two-piece joint kit from Elise Parts left too little room to reconnect everything, so he loosened the steering column. Remove the dash top, binnacle and instrument panel, and you will see a 13 mm bolt and two 10 mm bolts through a gold bracket on the column. Take the 13 mm bolt out completely and you can pull the wheel and column back enough to reach the top joint. Put it back through the hole with the 13 mm in a few turns, and leaving it loose gives a few millimetres more play to connect the shaft. He also suggests checking the wheel is straight before putting the dash back together.
- Finding a rack (2009): for a rack with play, Titan Motorsport were suggested for a replacement or their refurb service.