
This job takes the rear brake and suspension apart. Support the car on axle stands, not just a jack: there is a lot of hammering and pulling. Refitting means getting the caliper, brake hose, handbrake cable and suspension bolts back correctly, so check every one before you drive. The thread gives no torque values, so use the figures in the factory manual.
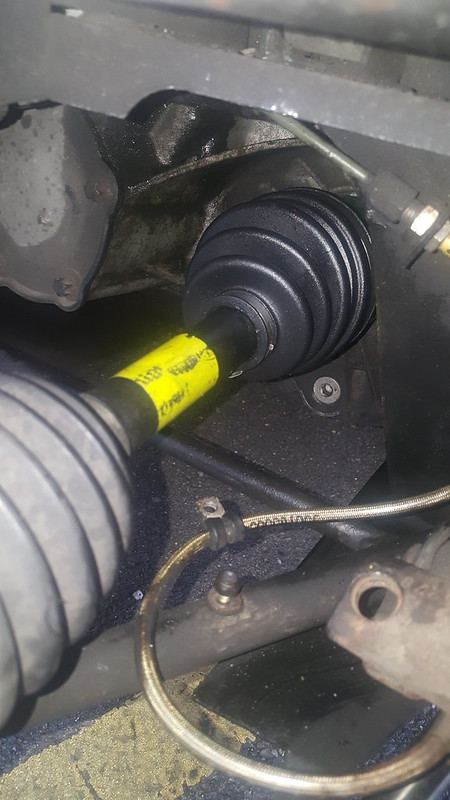
The passenger side is the awkward one because the driveshaft angle there is greater, and the boot is on the inner joint, at the gearbox end. A split boot lets the grease out, which is the whole reason to do the job. The rubber ages with time as much as it wears with mileage: one owner's failed at 12 years and 86,000 miles.
Help wanted
The thread has no torque values, no photos of the joint internals, and nothing confirming the boot is the same on NA and Turbo cars. If you have done this job, tell us your car's year and engine, and the torque values you used.Which route? How much to take off
Owners used several ways in, depending on how much room they needed:
- Full method: undertray, brake caliper and disc, damper, ball joints and toe link all off. Most work, most room.
- Damper: not vital to remove, though it frees up a lot of space. Two owners with aftermarket dampers (one Nitron) didn't need to remove theirs. It may matter only with OEM dampers.
- Minimal method: leave the undertrays, wishbones and damper in place and undo only the rear toe link, which gave enough room to remove the outer joint. One owner did it in 45 minutes in a paddock.
- Swivelling the hub: one owner's bolt-type ball joint separator wouldn't fit the lower ball joint, but he found enough clearance by swivelling the hub on the lower joint.
- If the hub won't swivel enough: another owner couldn't get enough swivel with only the toe link off, and had to separate the lower ball joint as well.
Start with the toe link off (see rear toe links) and see how far you get before taking anything else apart.
Taking it apart
Take off the middle undertray (or the full tray). Leave the car in gear with the handbrake off. Jack the car, support it and remove the wheel.
Brake caliper and disc
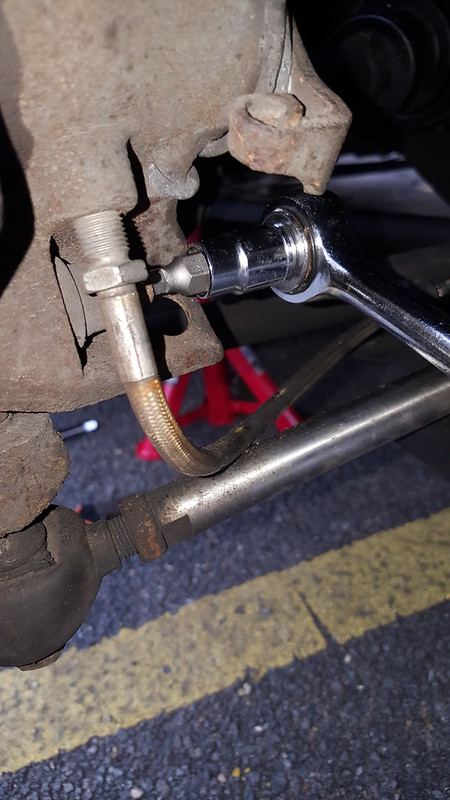
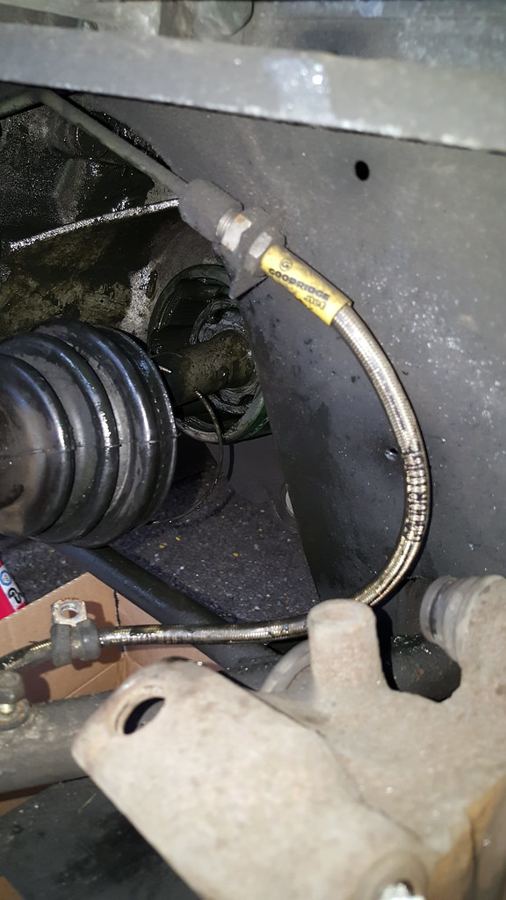
- Handbrake cable. Take the handbrake cable out of the caliper and undo the nut on the P clip holding the cable to the wishbone. You may need to loosen the 17 mm nuts on the cable near the axle stand in the photos to get slack.
- Undo the bolt holding the brake hose's P clip on the other side of the wishbone.
- Undo the 17 mm bolt at the top of the caliper, and drift out the pin holding the pads.
- Remove the front pad, pull back on the slider, and rotate the caliper away from the disc to remove the rear pad. Undo the lower bolt with the 6 mm Allen key and put the caliper somewhere where there is no strain on the hose. More on this caliper in the rear caliper strip-down.
- Undo the 5 mm locating screw on the disc and take the disc off. If it has been on for a long time it may need a tap with a rubber hammer.
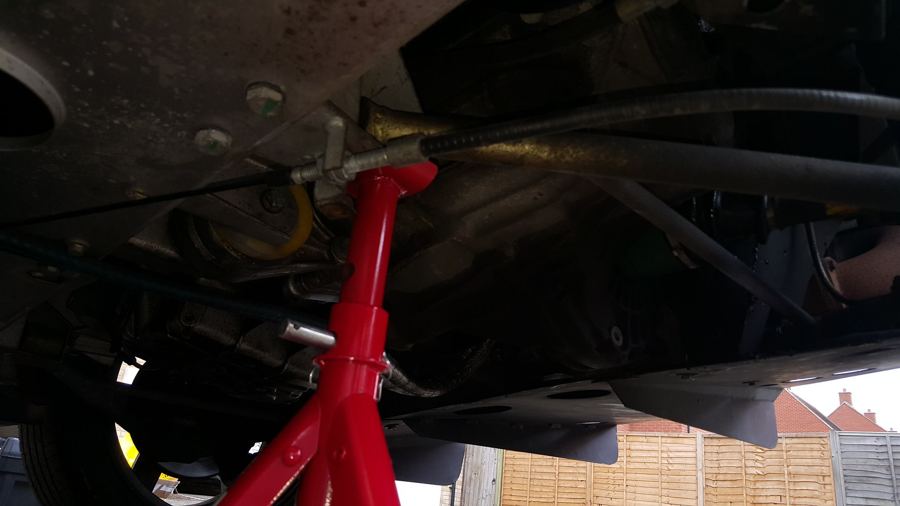
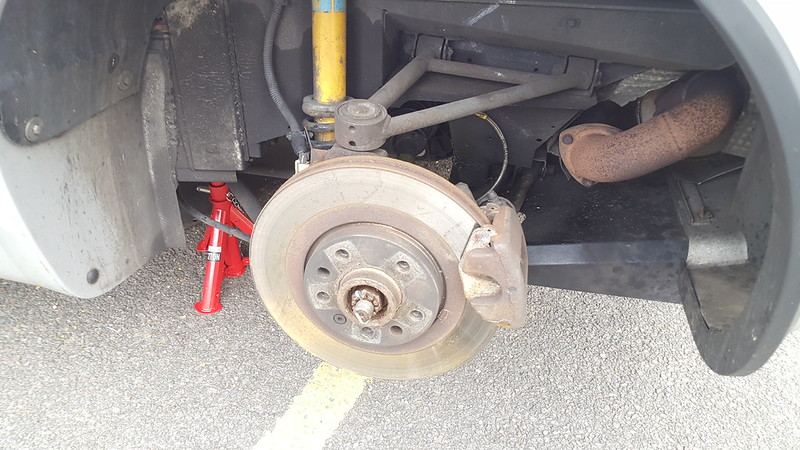
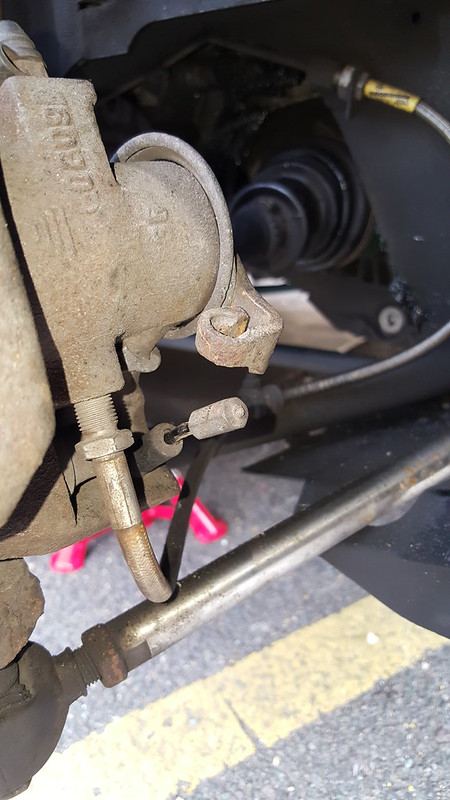
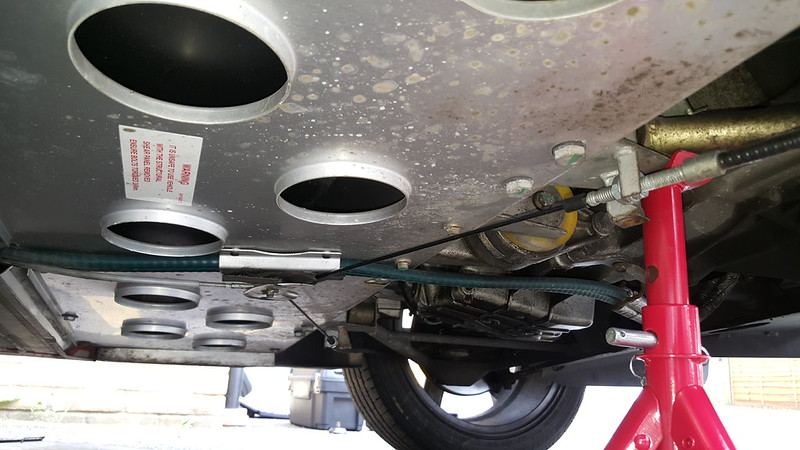
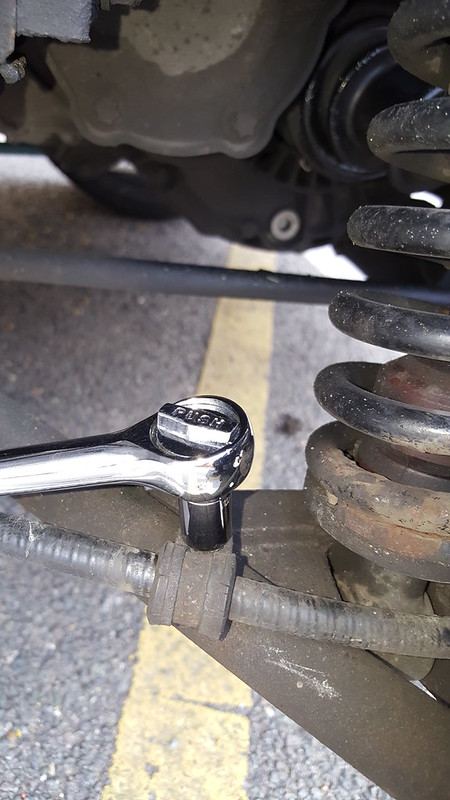
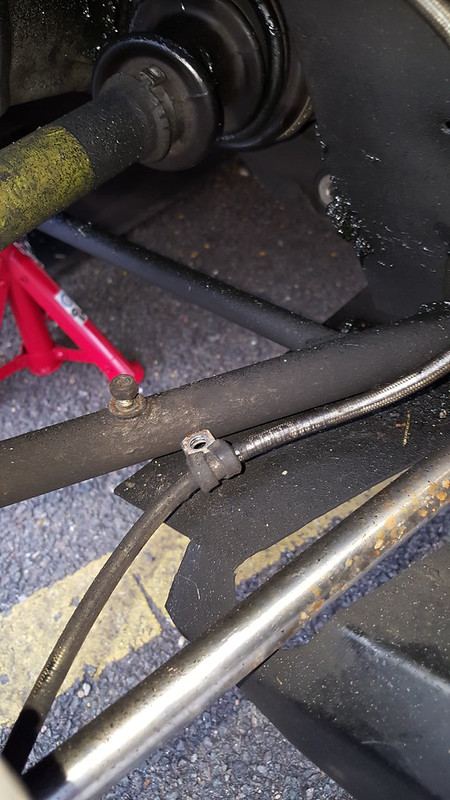
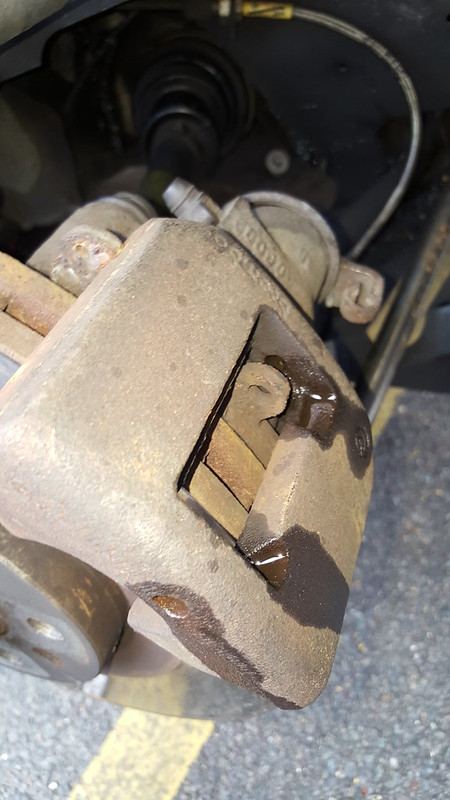
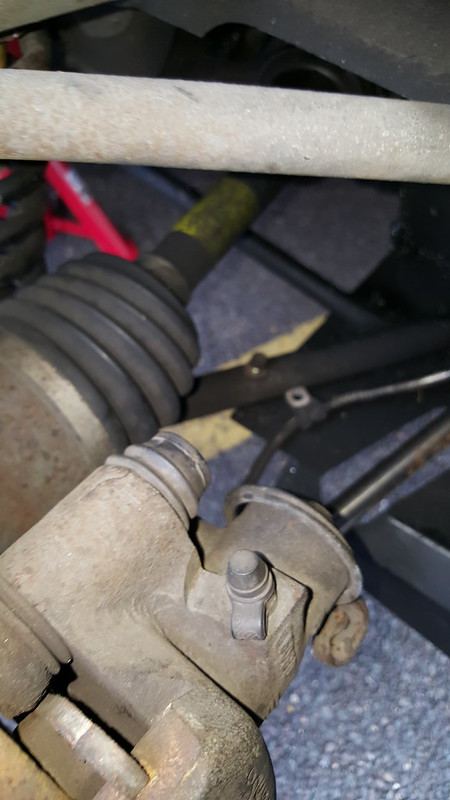
Toe link, damper and suspension
- If you are removing the damper, it has two bolts, a 15 mm nut and a 17 mm bolt.
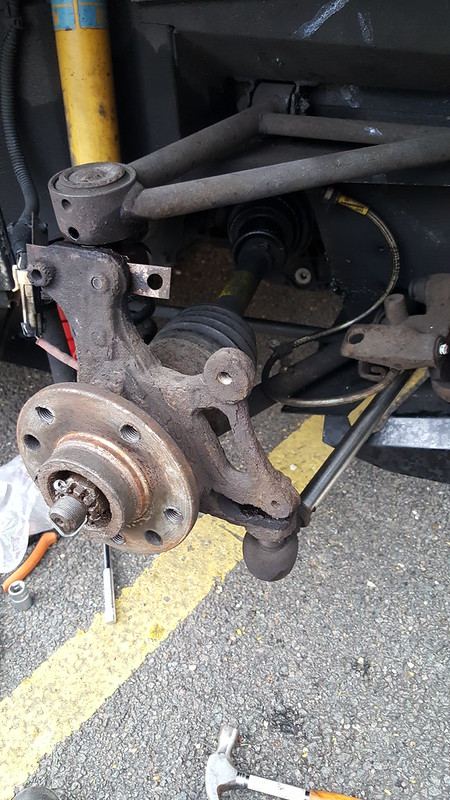
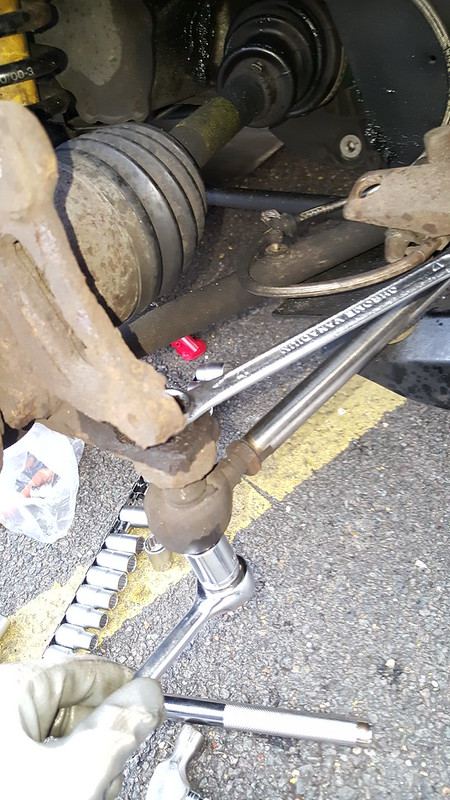
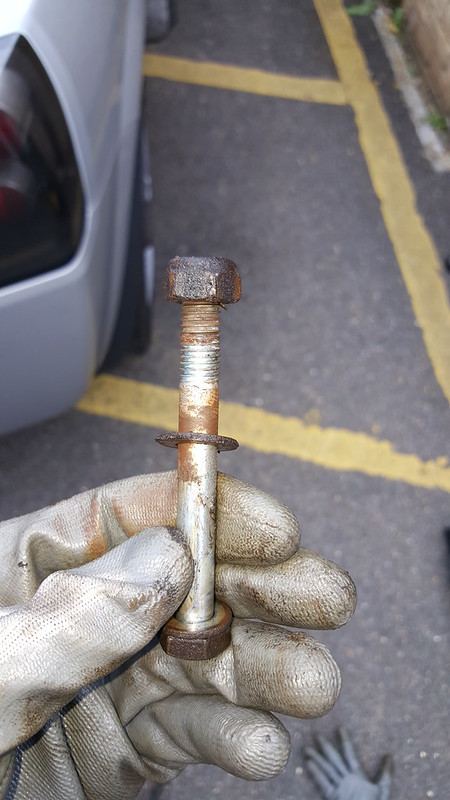
- Undo the upper and lower ball joint nuts and split both joints, but leave the hub on the studs to hold it while you undo the toe link from the knuckle. You will probably need a spanner under the knuckle to stop it turning. It is a good time to check the condition of the toe link stud or bolt.
- If you can't swivel the hub far enough, separate the lower ball joint fully (a separator and a hammer). You can then lift the hub off the ball joint and pull the driveshaft out of the CV housing. The housing stays connected to the gearbox, so no oil is lost.
Don't tug on the shaft until you have removed the retaining clip. One owner missed the clip that holds the CV joint together, pulled hard on the driveshaft and pulled the inner end out of the gearbox, and gearbox oil started to pour out. He lost only a couple of millilitres. If you don't take the shaft out of the joint, expect the shaft to come out of the gearbox.
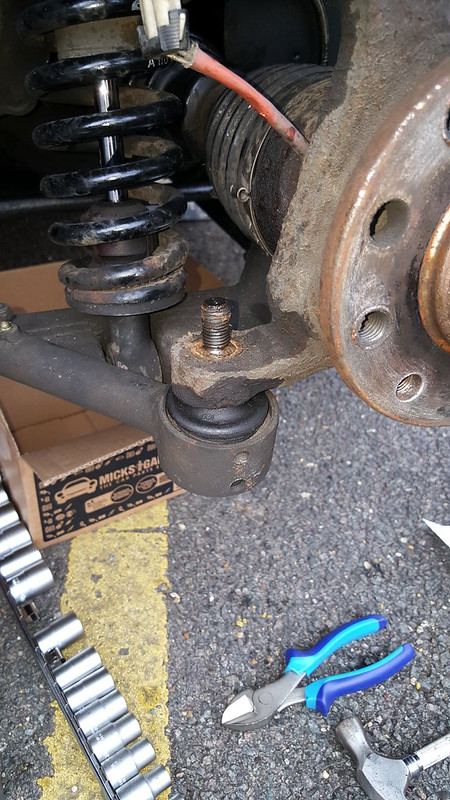
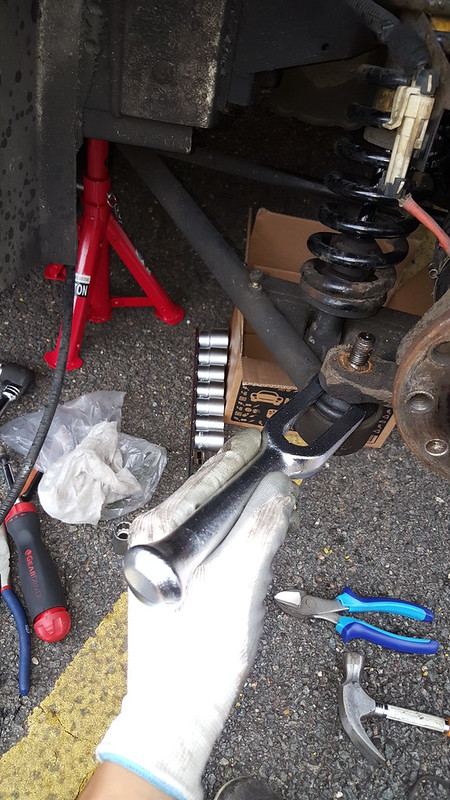
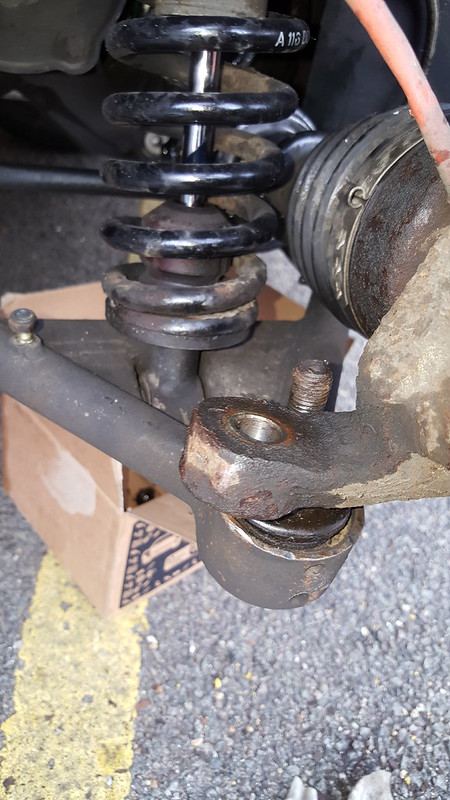
The messy bit: the CV joint
- Cut off or release the boot straps (slicing the boot away from the shaft works), and clean off as much old grease as you can. It is very sticky.
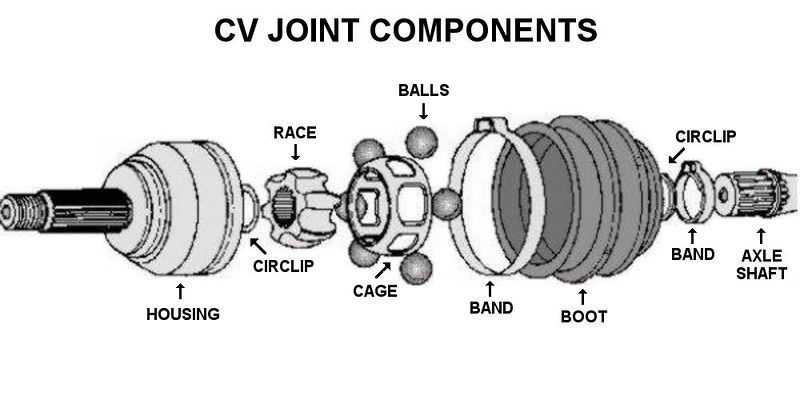
- Pull the boot back clear of the joint. Look for the retaining clip inside the CV housing. It is small and hard to find but easy to remove. It is a clip in a groove about 5 mm from the outer edge of the cup, and can be prised out with a small screwdriver. Another owner describes it as a retaining wire.
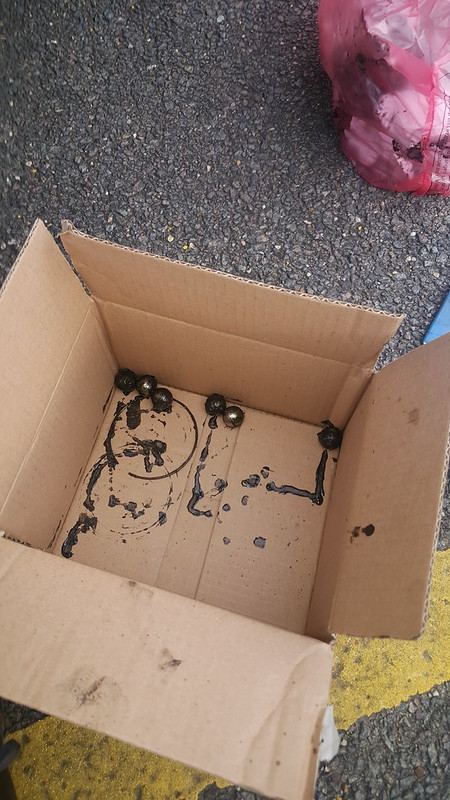
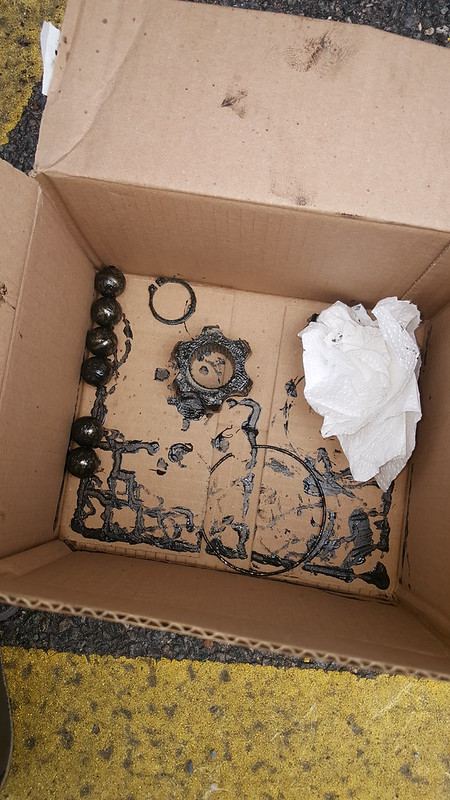
- With the clip out and the hub free of the ball joints, pull the driveshaft out of the housing. Catch the six large ball bearings as they fall.
- You are left with the end of the shaft with a cage, the six balls and an inner six-toothed "gear" (the race). Remove the circlip on the end of the shaft, then slide the race off. The cage then slides off. One owner advises noting the cage's orientation, but another checked and thought it was not directional.
- Clean everything, including the old grease from the cup left in the gearbox. Slide the old boot off the shaft.
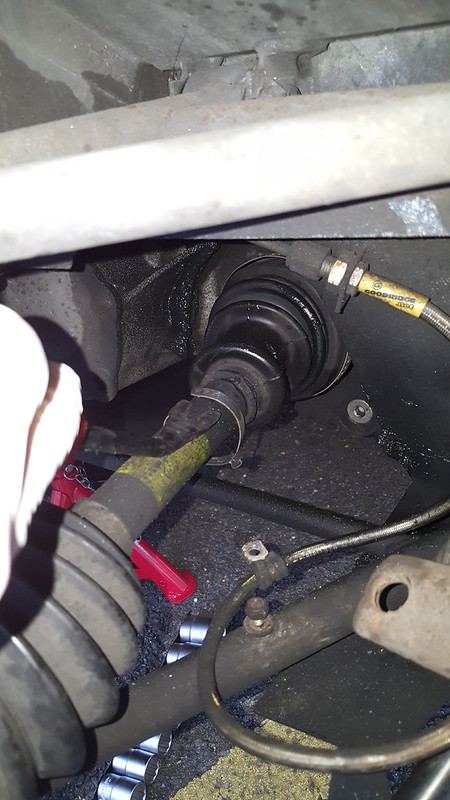
Rebuilding
- Slide the large CV band onto the shaft (the clip first), then the new boot with a little grease inside it, small end first. Leave the clips loose for now.
- Refit the cage, then the race. The race has a smooth section of about 3 to 5 mm inside its splines, and that goes towards the bottom of the shaft. Fit the circlip, and make sure it is properly seated. The race should go as far as it can, and you feel a click when it is in place.
- Grease. Put grease on all faces of the race, line up the cage and press the balls into their holes. With enough grease the balls stay in. Grease the six grooves in the cup, and the cage and balls. Total about 150 g for the inner joint. Don't forget the circlips before the boot goes on.
- Place the larger boot clip over the cup, then gently push the greased joint into the cup. Have a helper or a jack hold the hub while you fit a new clip into the groove in the cup to retain the joint. Put the knuckle back onto the ball joint studs.
- Seat both ends of the boot in their grooves, and tighten the bands.
- Slotted strap method: get as much tension on the strap as possible. You can use the old spring clip to work it through the teeth into the next holes, then crimp the small raised part of the strap with side cutters or, better, nail pincers. Do the small and large ends.
- Hose pliers also work for tightening the bands.
- Refit in reverse: lower wishbone nut and spacer washer, toe link joint and its spacers, brake disc, caliper and pads, handbrake cable, P clips, wheel and undertray.
Track use, grease and breathers
- Grease choice: don't use the grease that comes with the Kia Sedona boot, which one owner says went liquid and leaked out. Any decent grease is fine. Redline CV-2 (rated to 260 °C) and NEO HPCC1 (rated to 649 °C) are options if you want to spend more.
- A breather: one track-day owner went through several boots before adding a breather to the small inner section, and his hasn't split in about three years since fitting decent grease. Another had read of someone losing all their grease that way, and the first says that isn't proven. A breather on the larger section would be worse.
- Correct boot and ties: with the proper boot, cleaned gripping faces and the correct metal ties, one owner's has never come off.
Worth knowing
- Joint wear: one owner inspected his joint internals and found severe pitting on the ball races, after noticing a clunk when picking up gently and a degree or two of play in the shaft halves. He says the passenger side wears faster because of the sharper angles. Another owner found no wear at all, and a third thinks the joint has an easy life.
- NA and Turbo: the thread asks whether the boot is the same for both, and the answer isn't spelled out. A 2003 NA owner fitted the Courtenay Sport boot in about three hours using this thread, so it fits at least that car. Check with the supplier for yours.